Add a product to multiple categories
Goal
To assign a single product to multiple categories, improving product discoverability as customers browse different sections of your catalog.
Step 1: Navigate to the Product
- From the backoffice menu, select PIM > Products & Clusters.
- Search for and click on the product you want to assign to additional categories.

Step 2: Access Category Settings
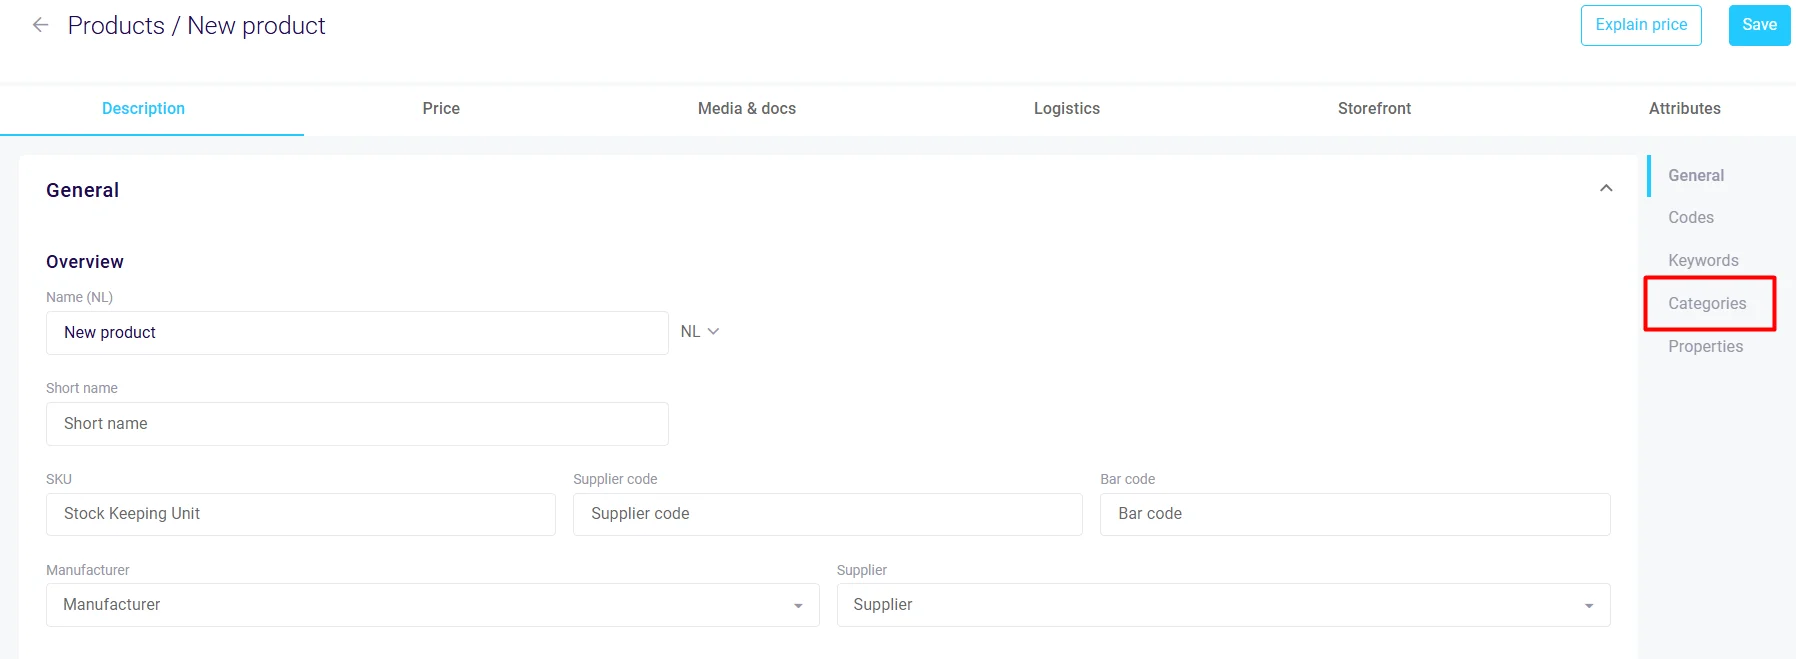
- In the product details screen, locate the Categories section:
- Use the right sidebar to jump to it
- Or scroll down to find the section
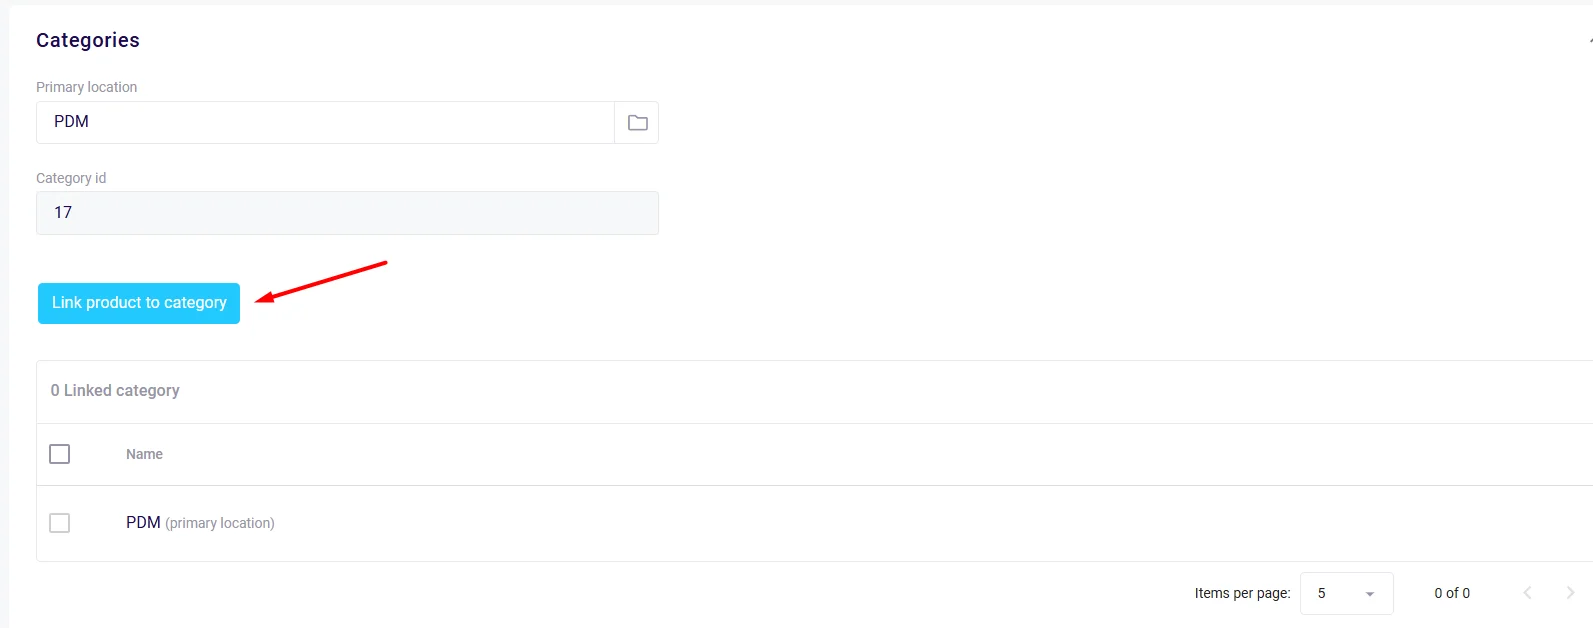
- The current category assignment is displayed here.

Step 3: Add Additional Categories
- Click Link product to category.
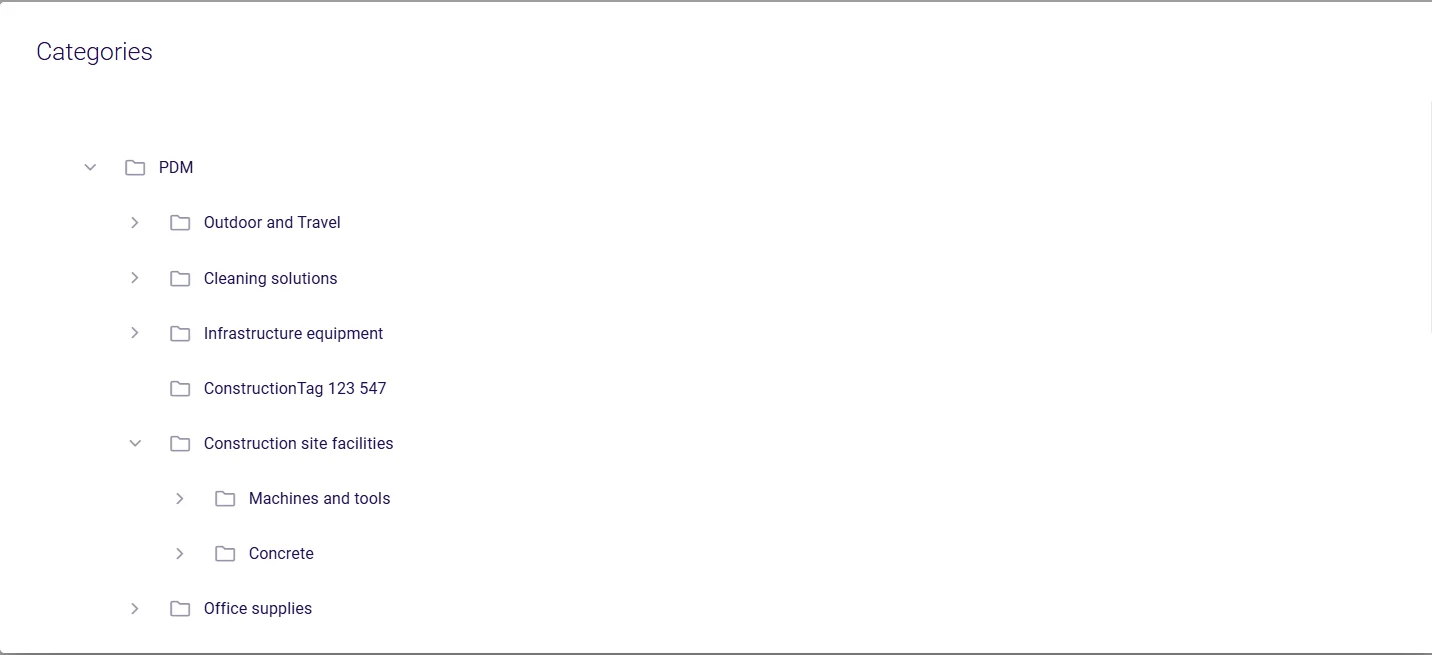
- A popup displays the complete category tree.

- Navigate through the category structure and click on each category where you want the product to appear.
- The selected category is automatically added to the product's category list.

- Repeat for all desired categories.
Step 4: Save Changes
- Scroll to the top of the page.
- Click Save in the top right corner to confirm all category assignments.

Alternative Methods
Bulk Operations from Categories
- Navigate to PIM > Categories.
- Find your target category and either:
- Click Add products to assign multiple products to this category
- Click Show products then Link products to move products between categories
- Select multiple products using checkboxes for efficient bulk assignment.
Removing Category Assignments
- In the product's Categories section, click the X icon next to any category to remove it.
- Products must remain in at least one category.
Important Notes
- Products can belong to unlimited categories
- Category assignments affect product URLs and breadcrumb navigation
- Products inherit category-specific attributes and settings
- Search results include products from all assigned categories