Create a customer
Goal
To create a new B2C customer in the backoffice, capturing personal information and contact details for individual buyer management and personalized service.
Step 1: Navigate to Customers
- From the backoffice menu, select User Management > Users > Customers (B2C).
- The customers list displays:
- Name
- Customer Group

Step 2: Start New Customer Creation
- Click New Customer button in the top right.
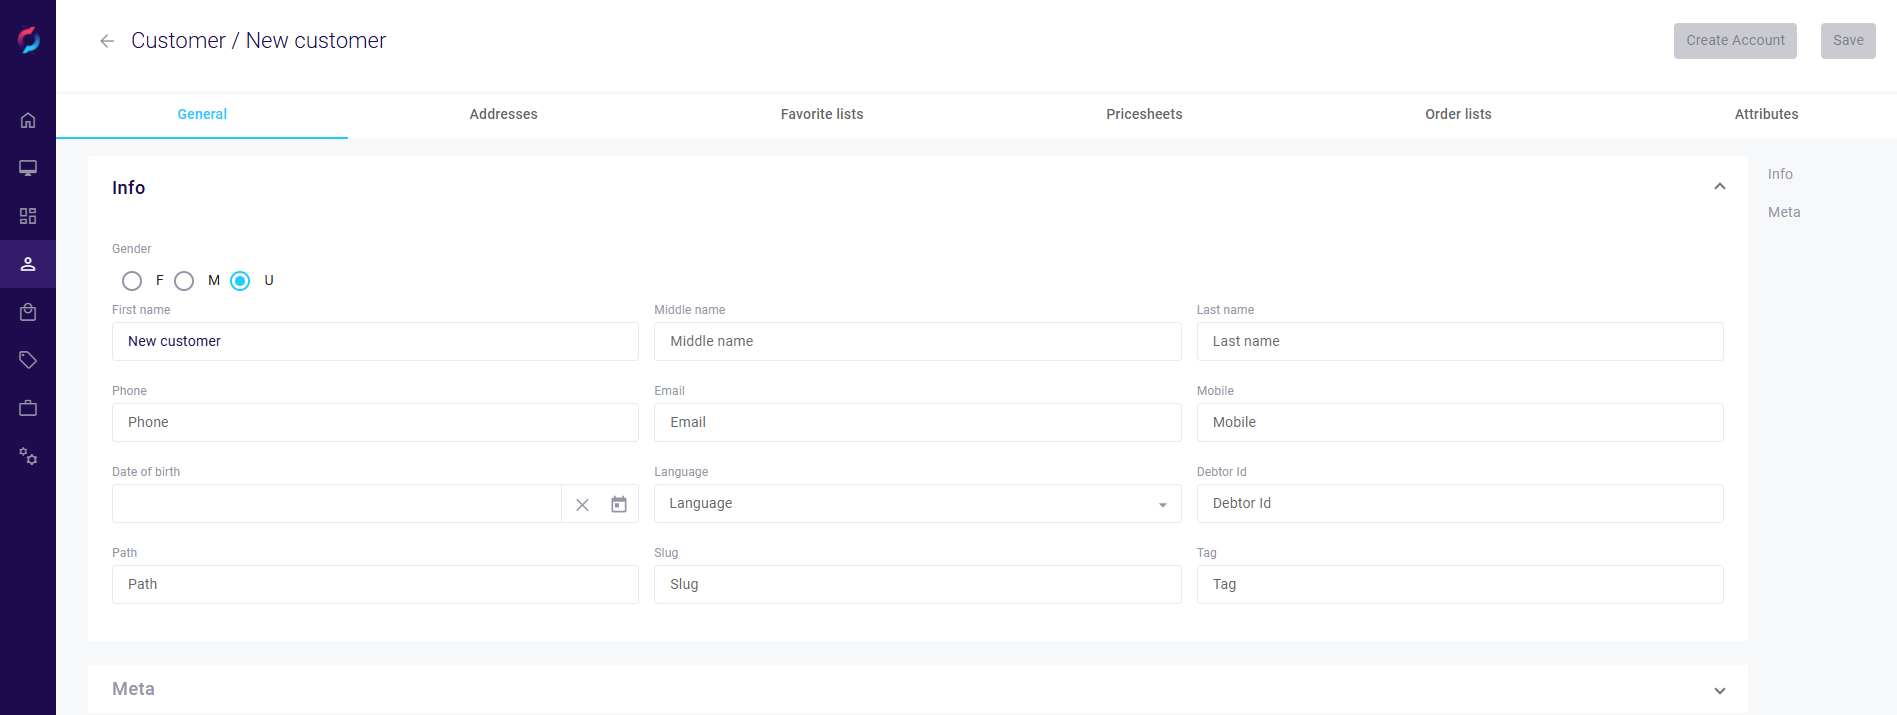
- The new customer form opens with tabs for:
- General
- Addresses
- Favorite Lists
- Pricesheets
- Order Lists
- Attributes

Step 3: Enter Customer Information
In the General tab Info section:
Personal Details
- Gender: Select F (Female), M (Male), or U (Unknown)
- First Name: Customer's first name
- Middle Name: Middle name if applicable
- Last Name: Customer's last name
- Date of Birth: Select from date picker
Contact Information
- Email: Email address (required)
- Phone: Primary phone number
- Mobile: Mobile phone number
- Language: Preferred communication language
Additional Fields
- Slug: Auto-generated from name (editable)
Step 4: Add Customer Addresses
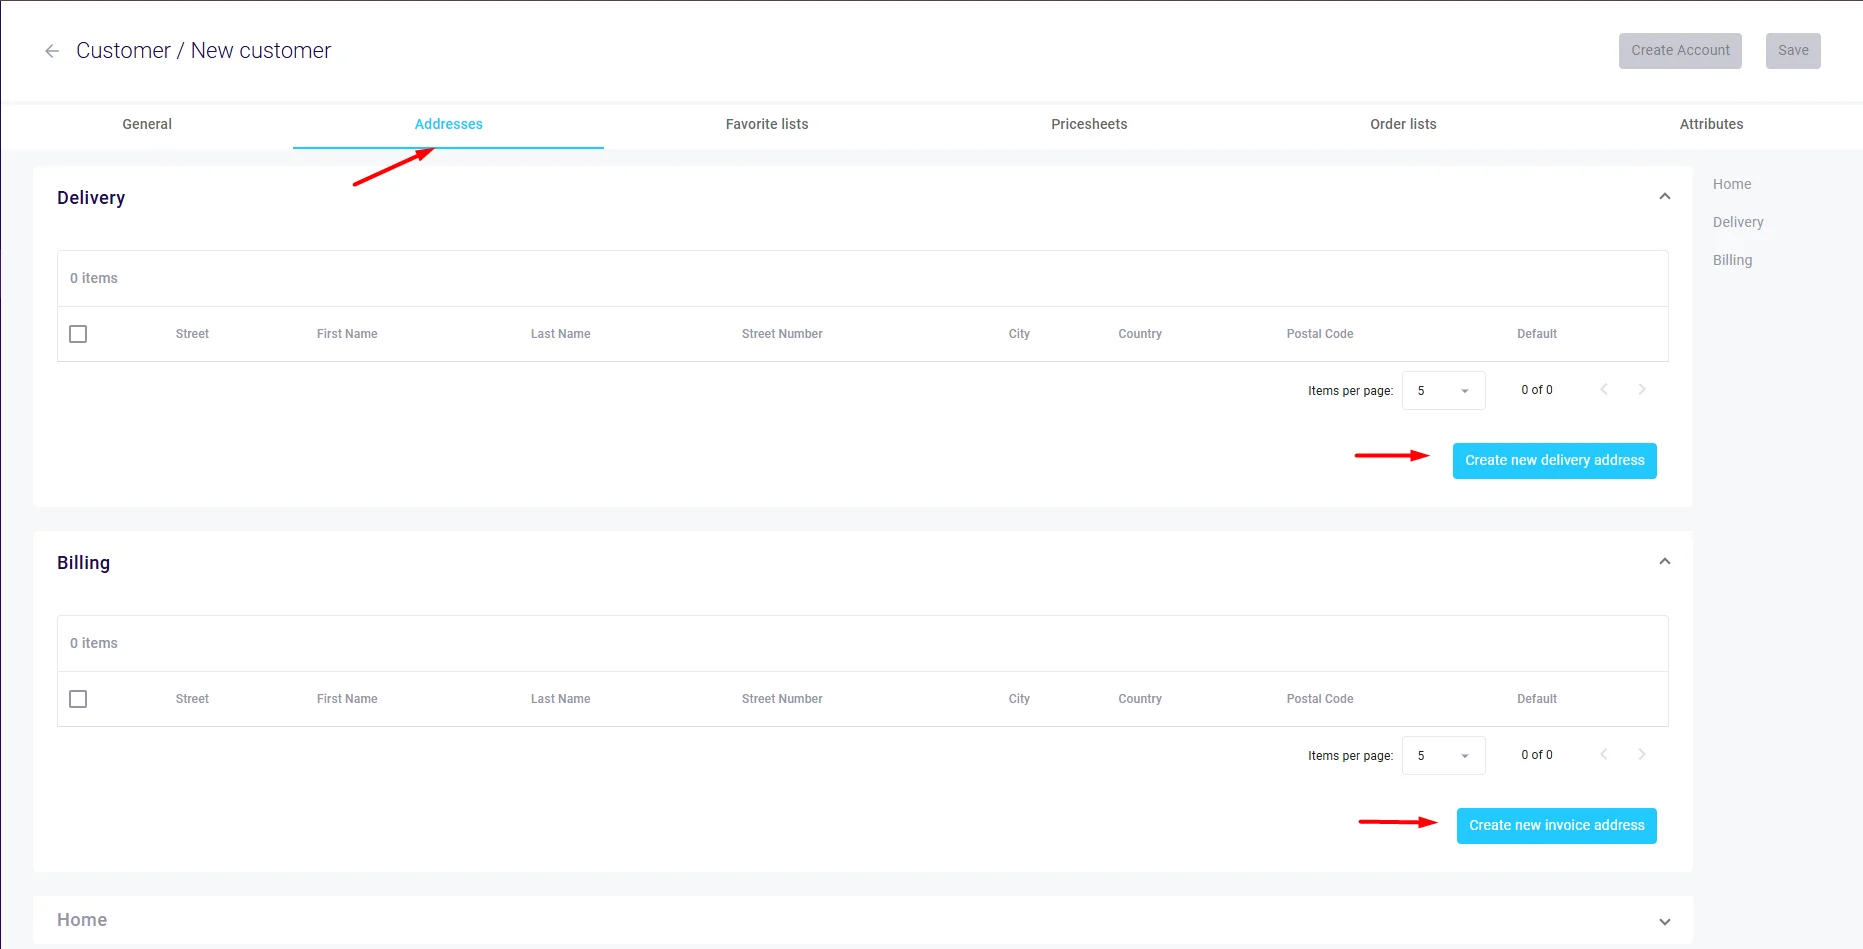
- Click the Addresses tab.
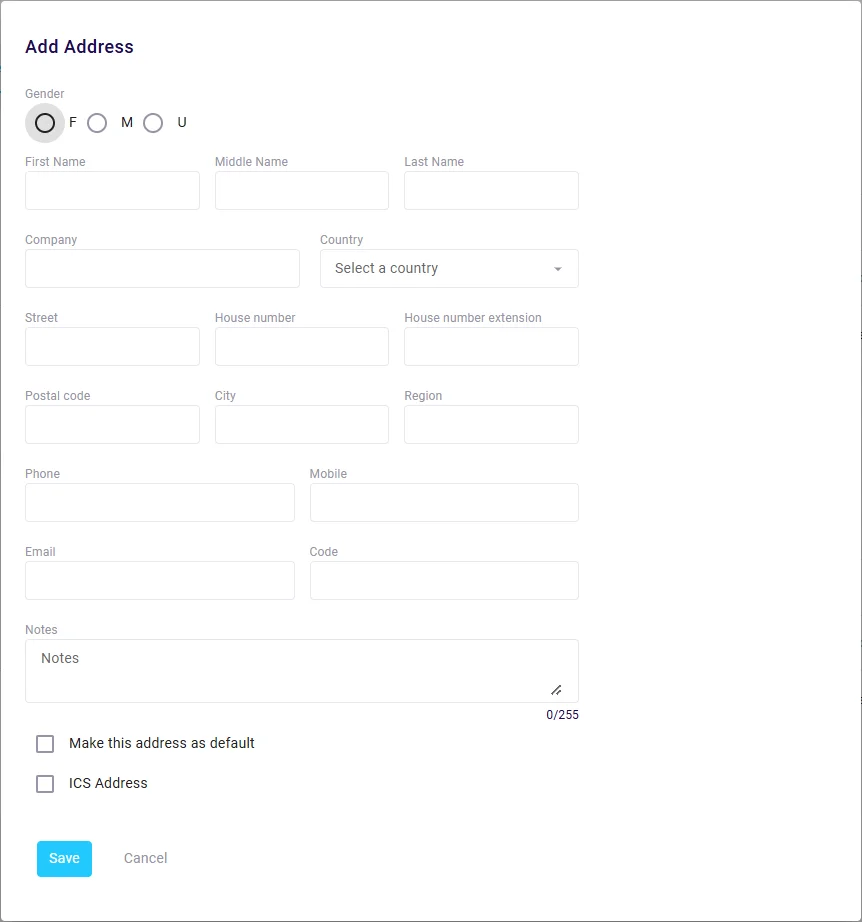
- Click Add Address to create addresses.

- For each address, enter:
- Street address and number
- City and postal code
- Country
- Address type (delivery or invoice)
- Set one address as default for shipping or billing.

Step 5: Configure Commercial Settings
Navigate through tabs as needed:
- Favorite Lists: Assign product lists for quick reordering
- Pricesheets: Apply customer-specific pricing
- Order Lists: Set product visibility permissions
- Attributes: Add custom fields for segmentation
Step 6: Save the Customer
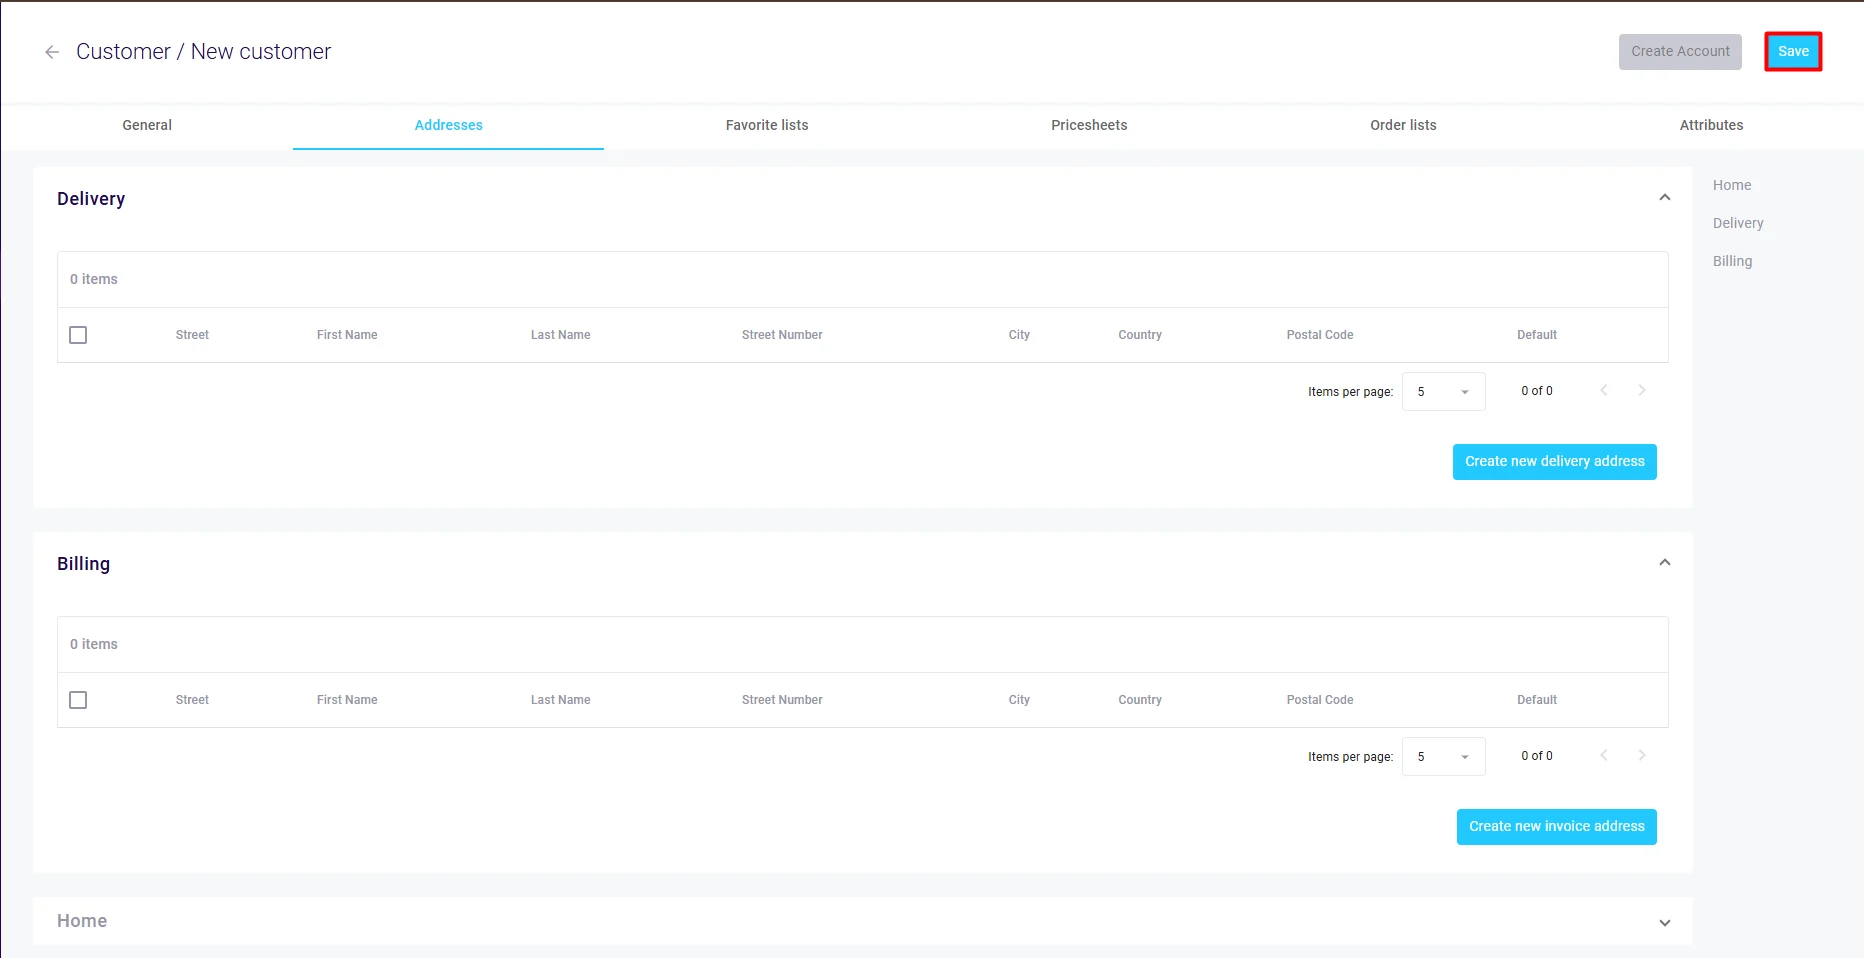
- Click Save at the bottom of the form.

- A confirmation message appears.
- The new customer appears in the customers list.

Next Steps
- Create user login credentials if needed