Create a contact
Goal
To add a new B2B contact in the backoffice and associate them with a company, capturing personal information and commercial settings for effective business relationship management.
Step 1: Navigate to Contacts
- From the backoffice menu, select User Management > Users > Contacts (B2B).
- The contacts list displays:
- Name
- Company
- Phone

Step 2: Select Company for Contact
- Click New Contact button in the top right.
- A company selection popup appears.
- Search for and select the company this contact belongs to.
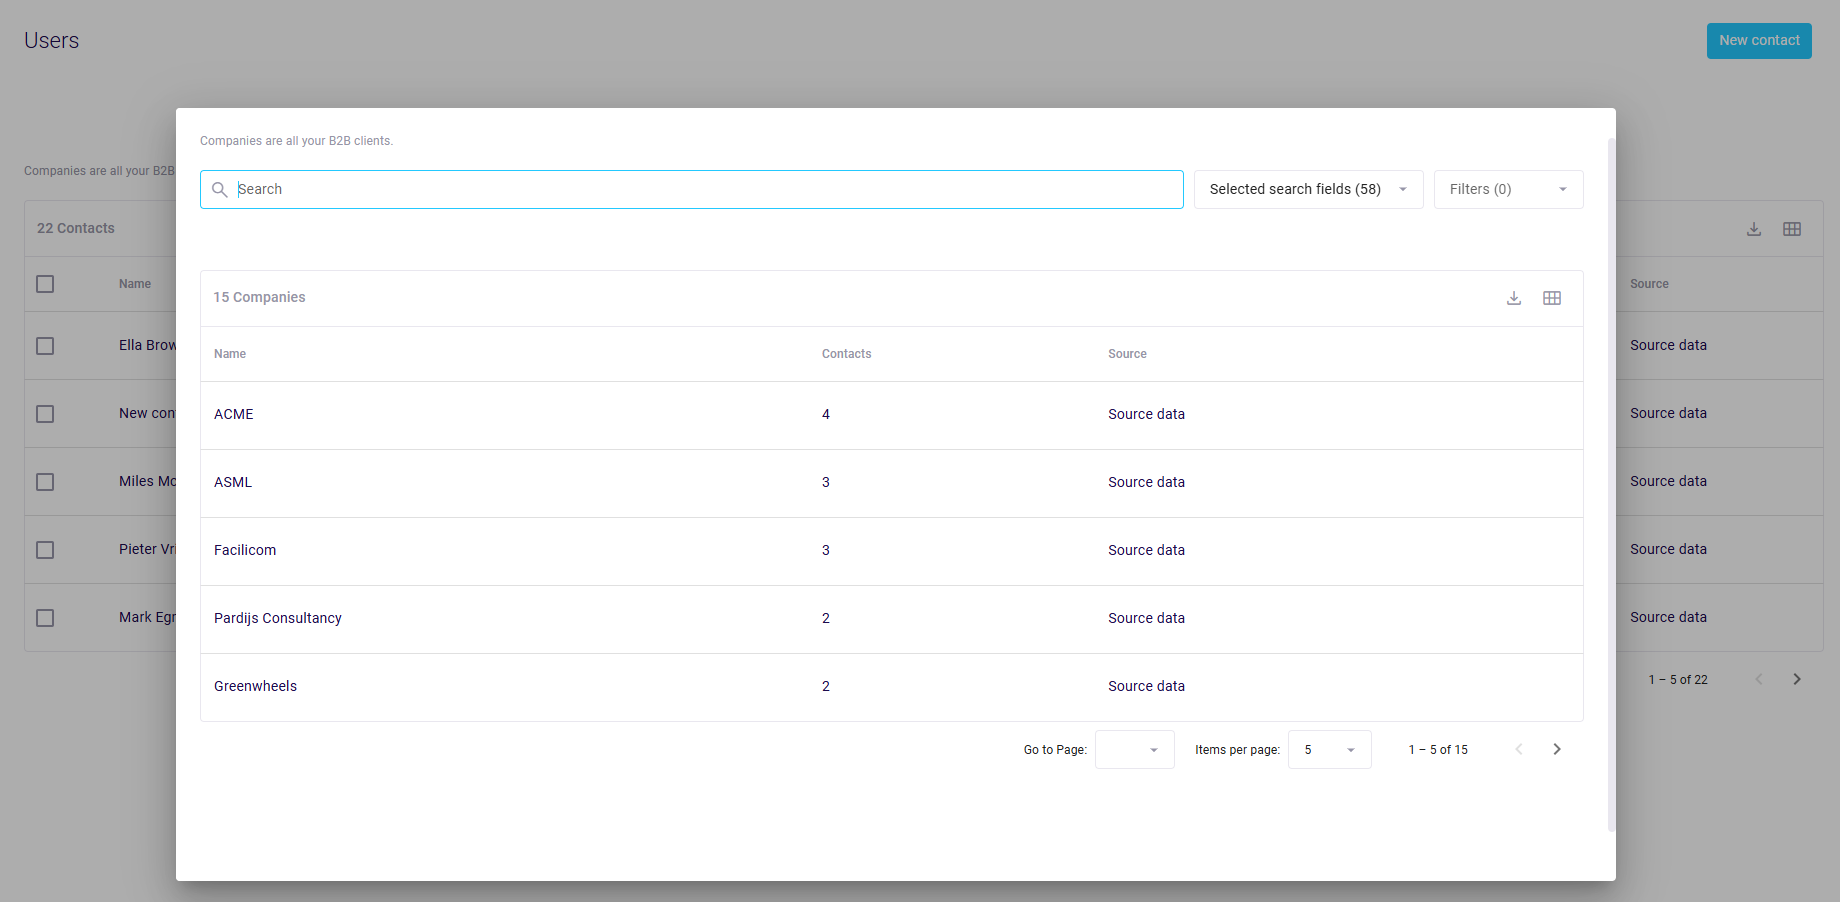
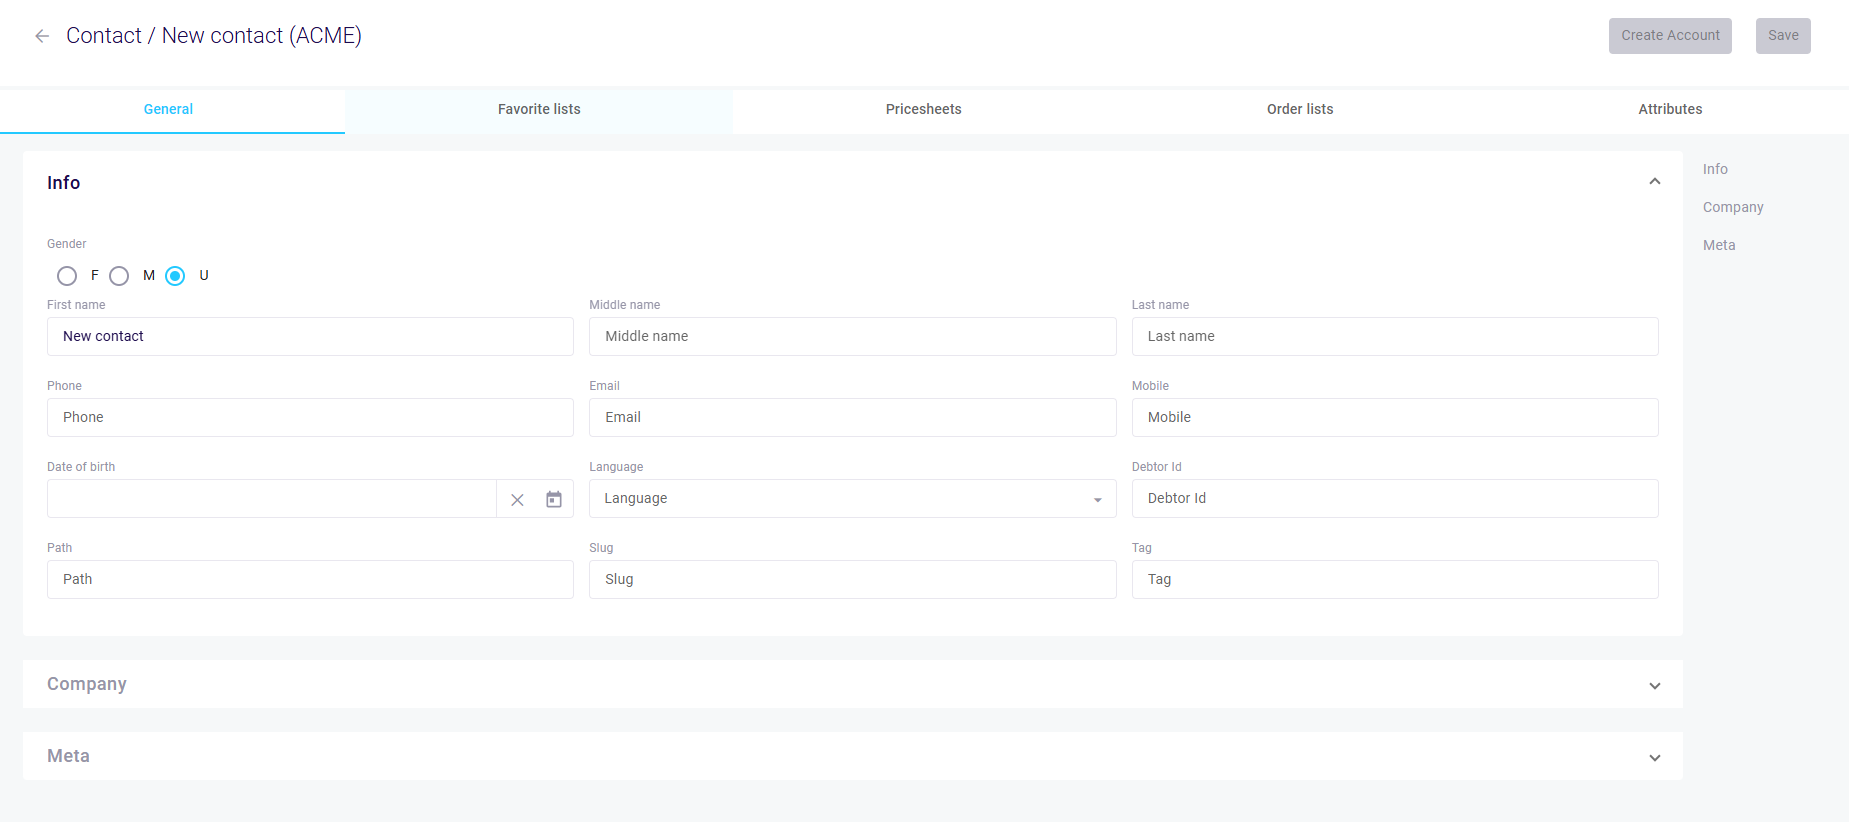
- After selecting a company, the new contact form opens.
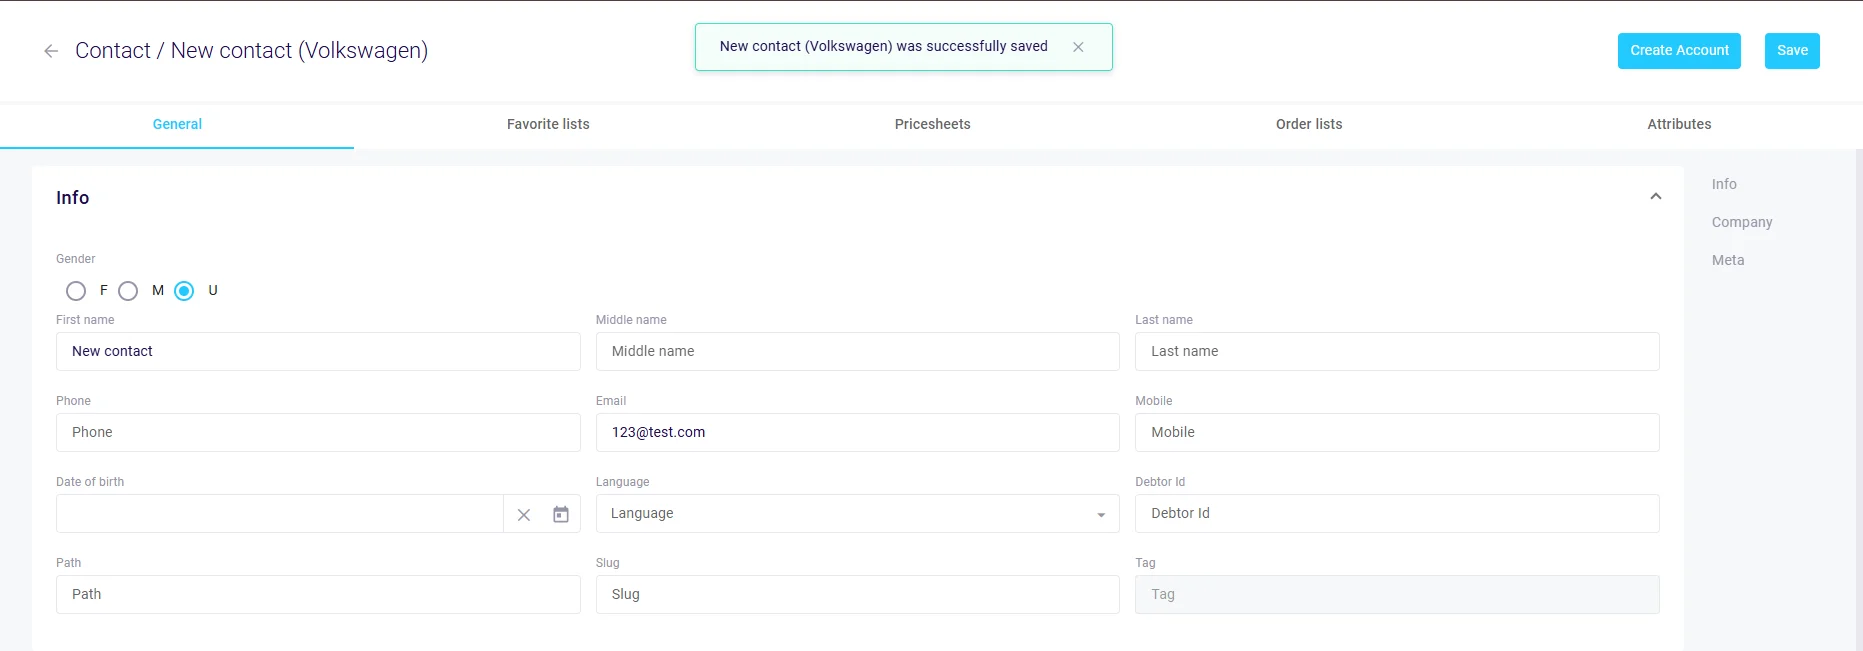
Step 3: Enter Contact Information
In the General section, complete:
Personal Details
- Gender: Select F (Female), M (Male), or U (Unknown)
- First Name: Contact's first name
- Middle Name: Middle name if applicable
- Last Name: Contact's last name
- Date of Birth: Select from date picker
Contact Information
- Email: Business email address
- Phone: Office phone number
- Mobile: Mobile phone number
- Language: Preferred communication language
System Fields
- Path: Auto-generated based on hierarchy
- Slug: Auto-created from name (editable)
Step 4: Review Company Assignment
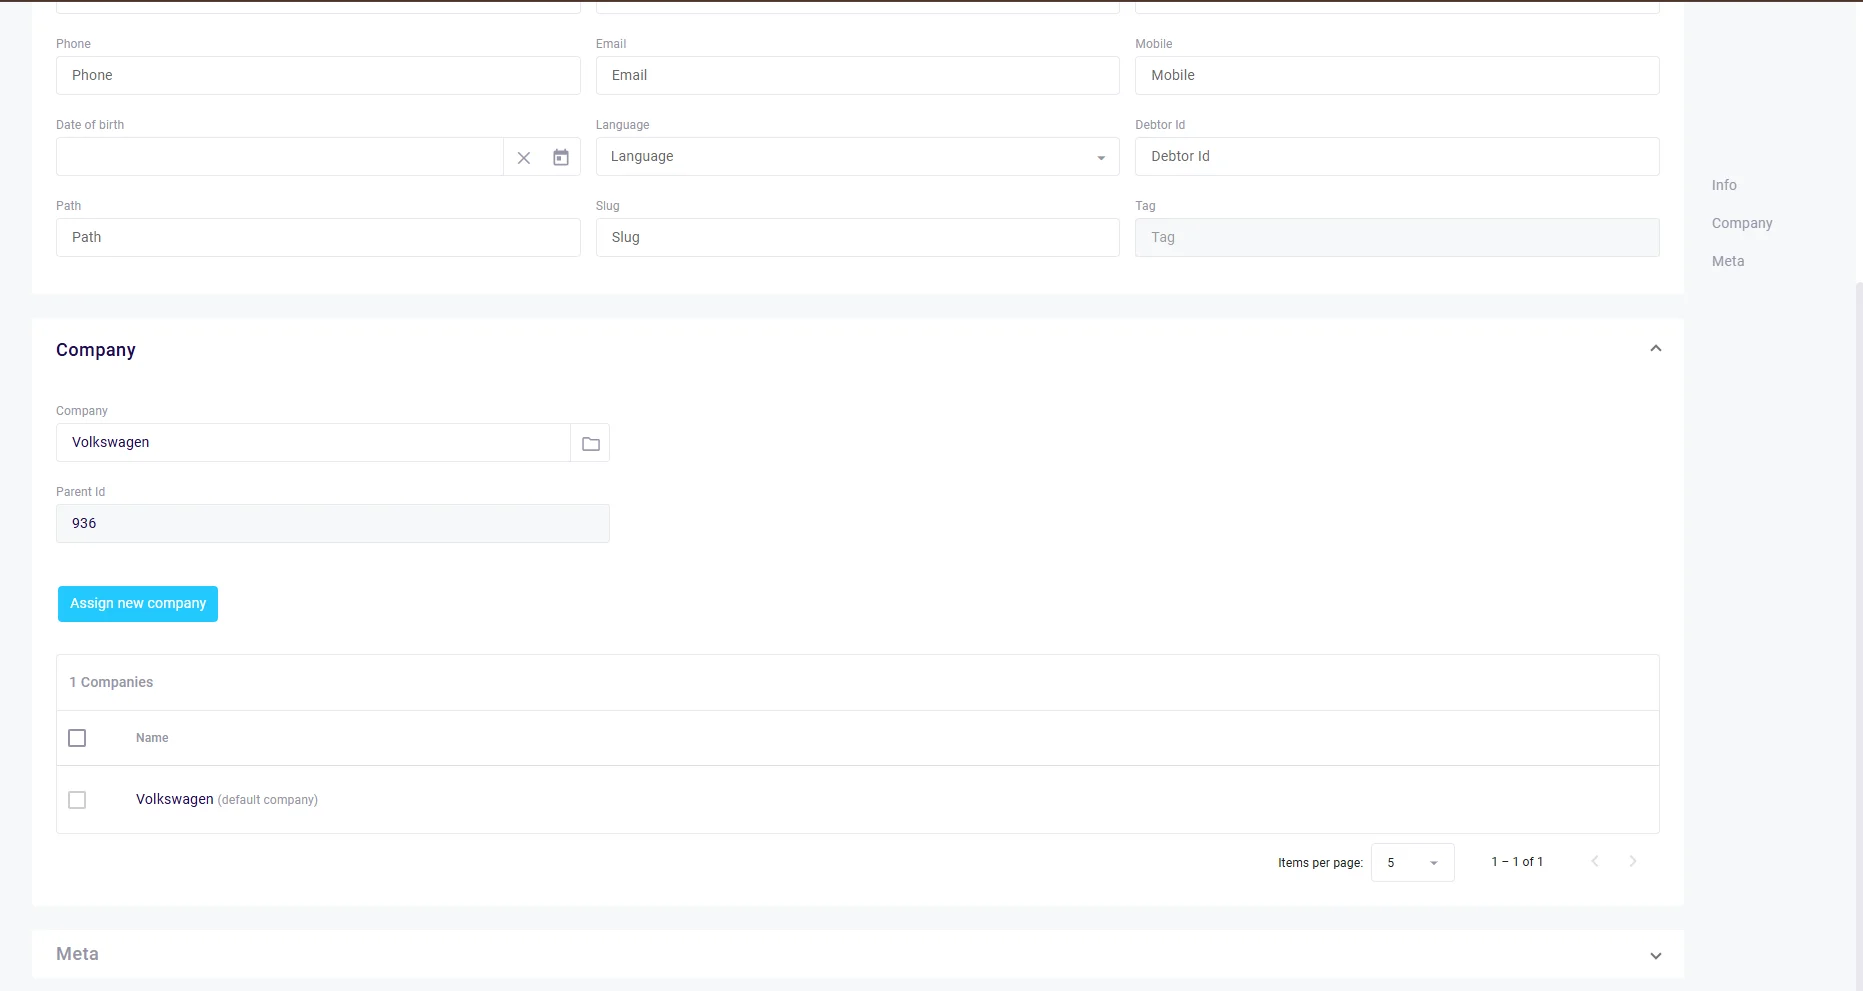
In the Company section:
- The selected company is automatically linked
- To change companies, click the company field
- One contact can belong to multiple companies if needed
Step 5: Configure Additional Settings
Navigate through tabs to set:
- Favorite Lists: Assign product lists for quick ordering
- Pricesheets: Link contact-specific pricing
- Order Lists: Apply ordering permissions
- Attributes: Add custom fields as configured in your system
Step 6: Save the Contact
- Click Save at the bottom of the form.
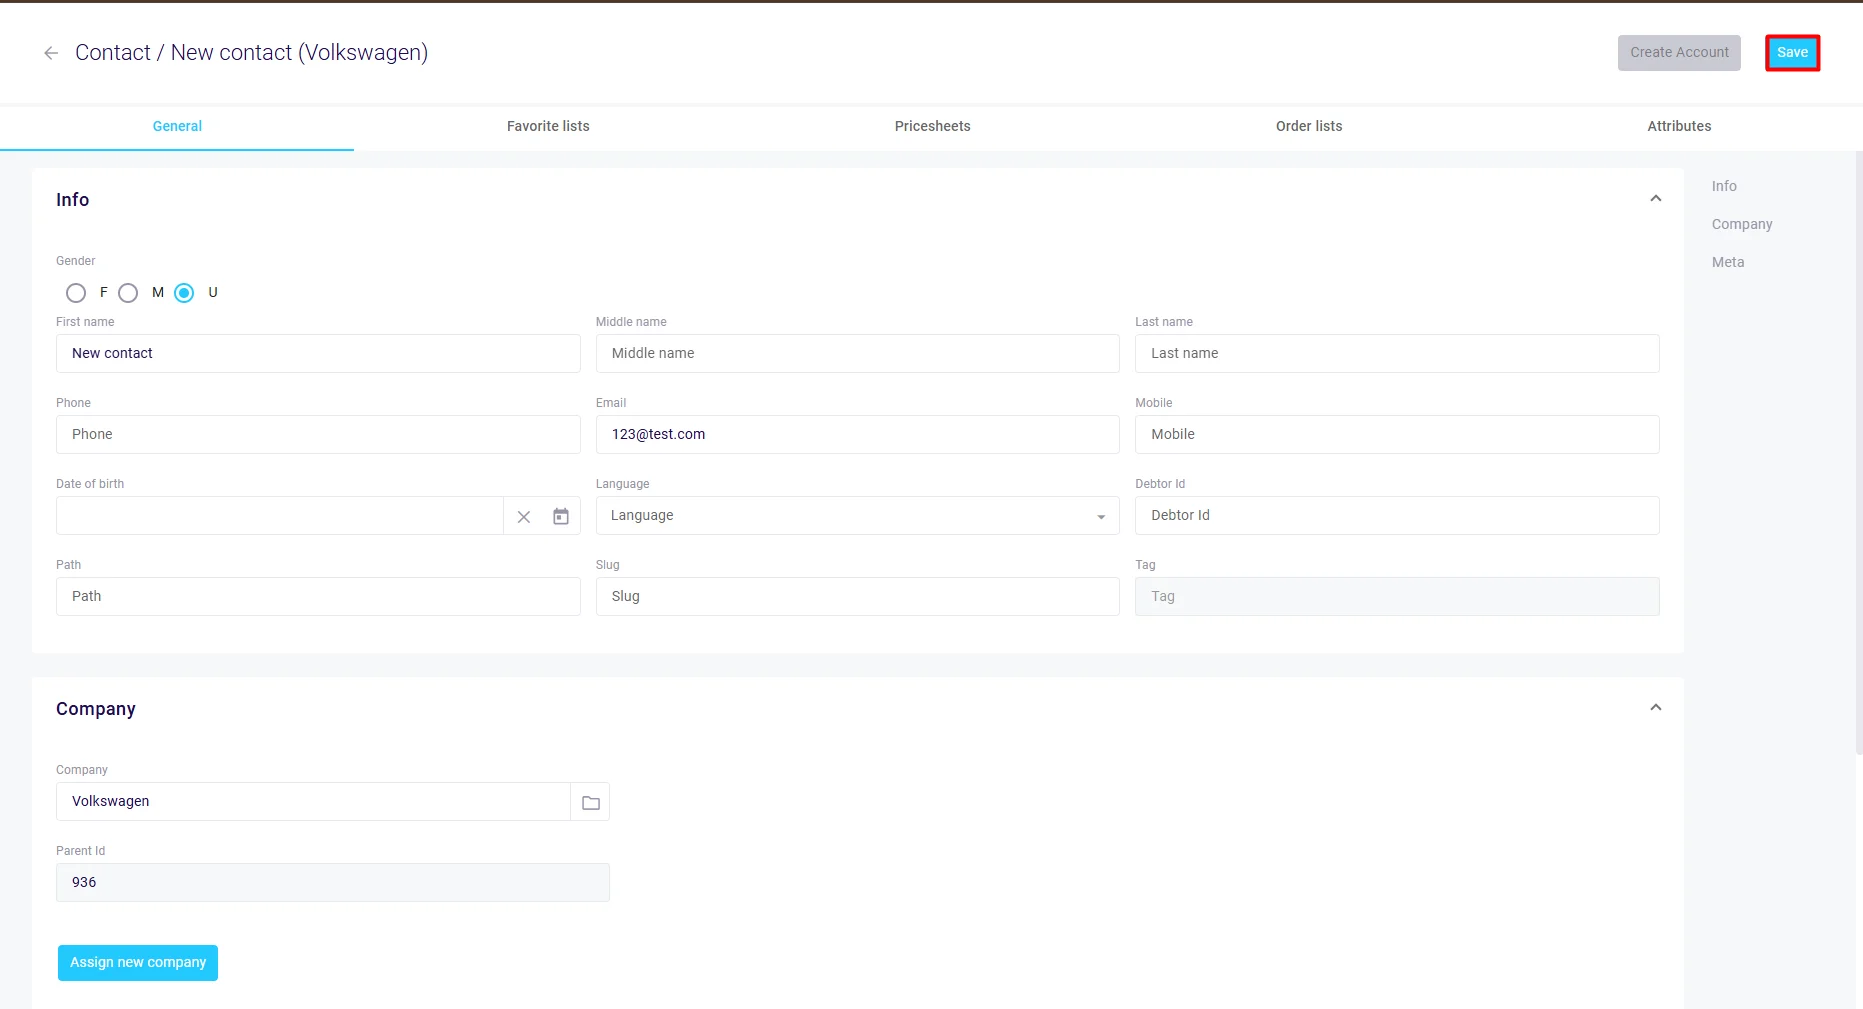
- A confirmation message appears.
- The new contact now appears in the contacts list.
Next Steps
- Create a user login for the contact if needed
- Add the contact to additional companies if applicable
- Configure specific commercial settings
- Set up ordering permissions via order lists