Create a company
Goal
To create a new B2B company in the backoffice, capturing essential business information, contacts, addresses, and commercial settings for proper client management.
Step 1: Navigate to Companies
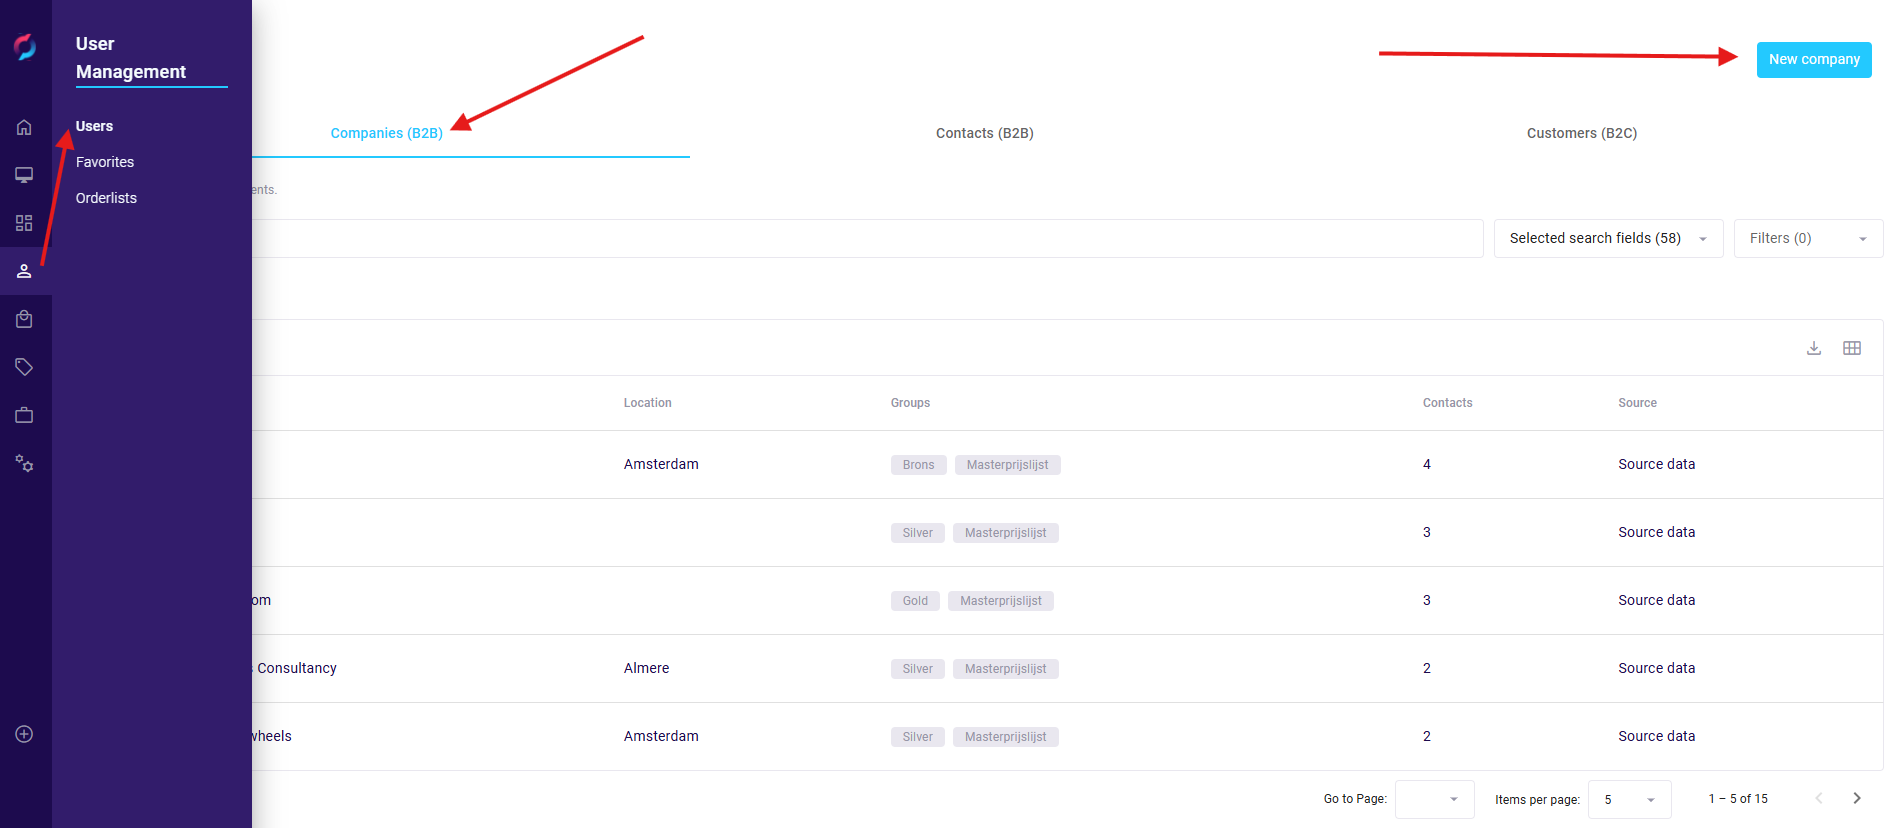
- From the backoffice menu, select User Management > Users > Companies (B2B).
- The companies list displays existing companies with:
- Name
- Location
- Groups
- Contacts count
- Source
Step 2: Start New Company Creation
- Click New Company button at the top right.
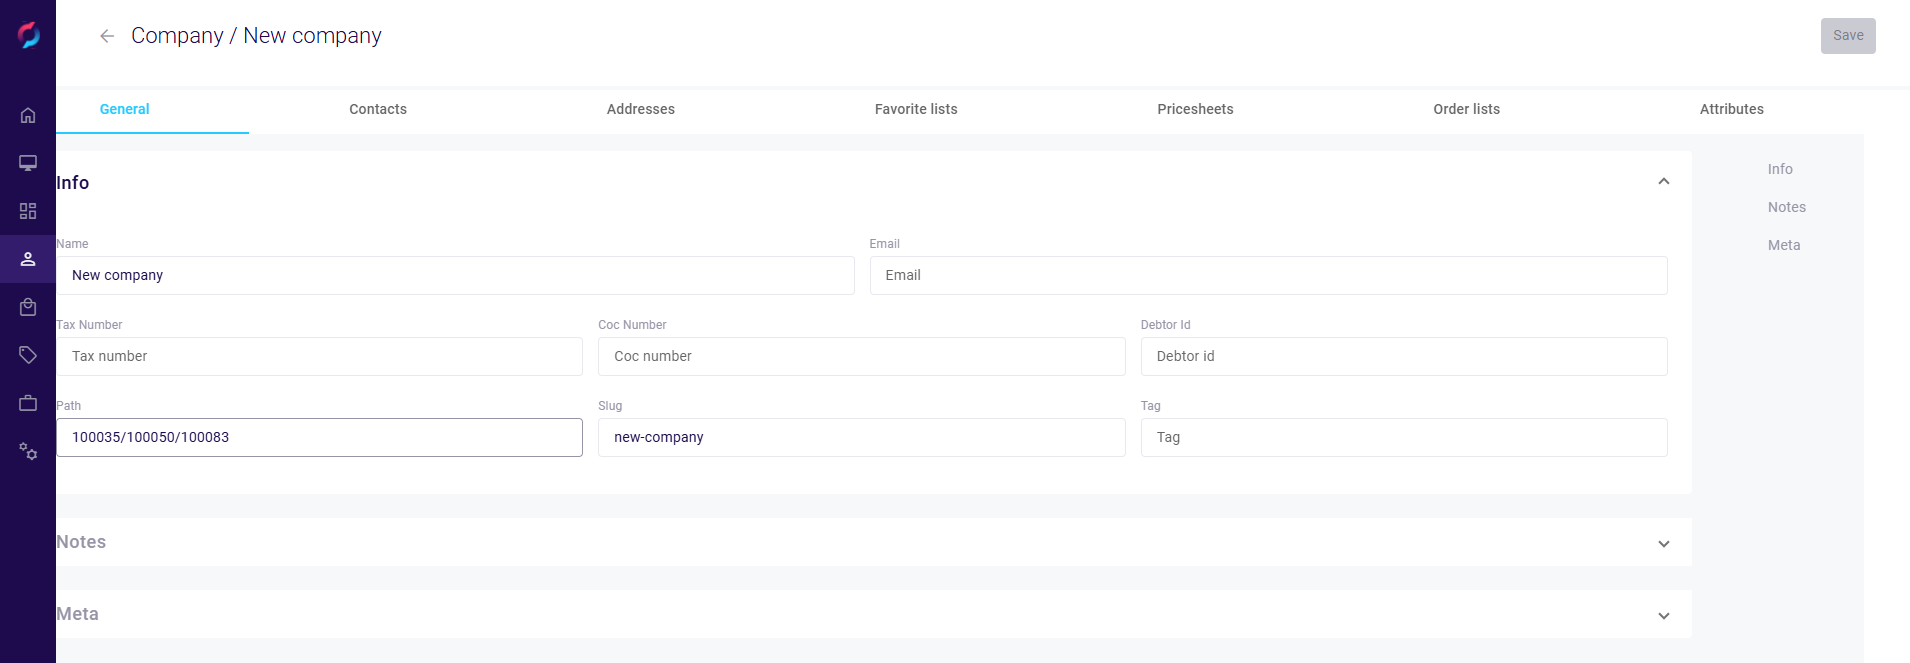
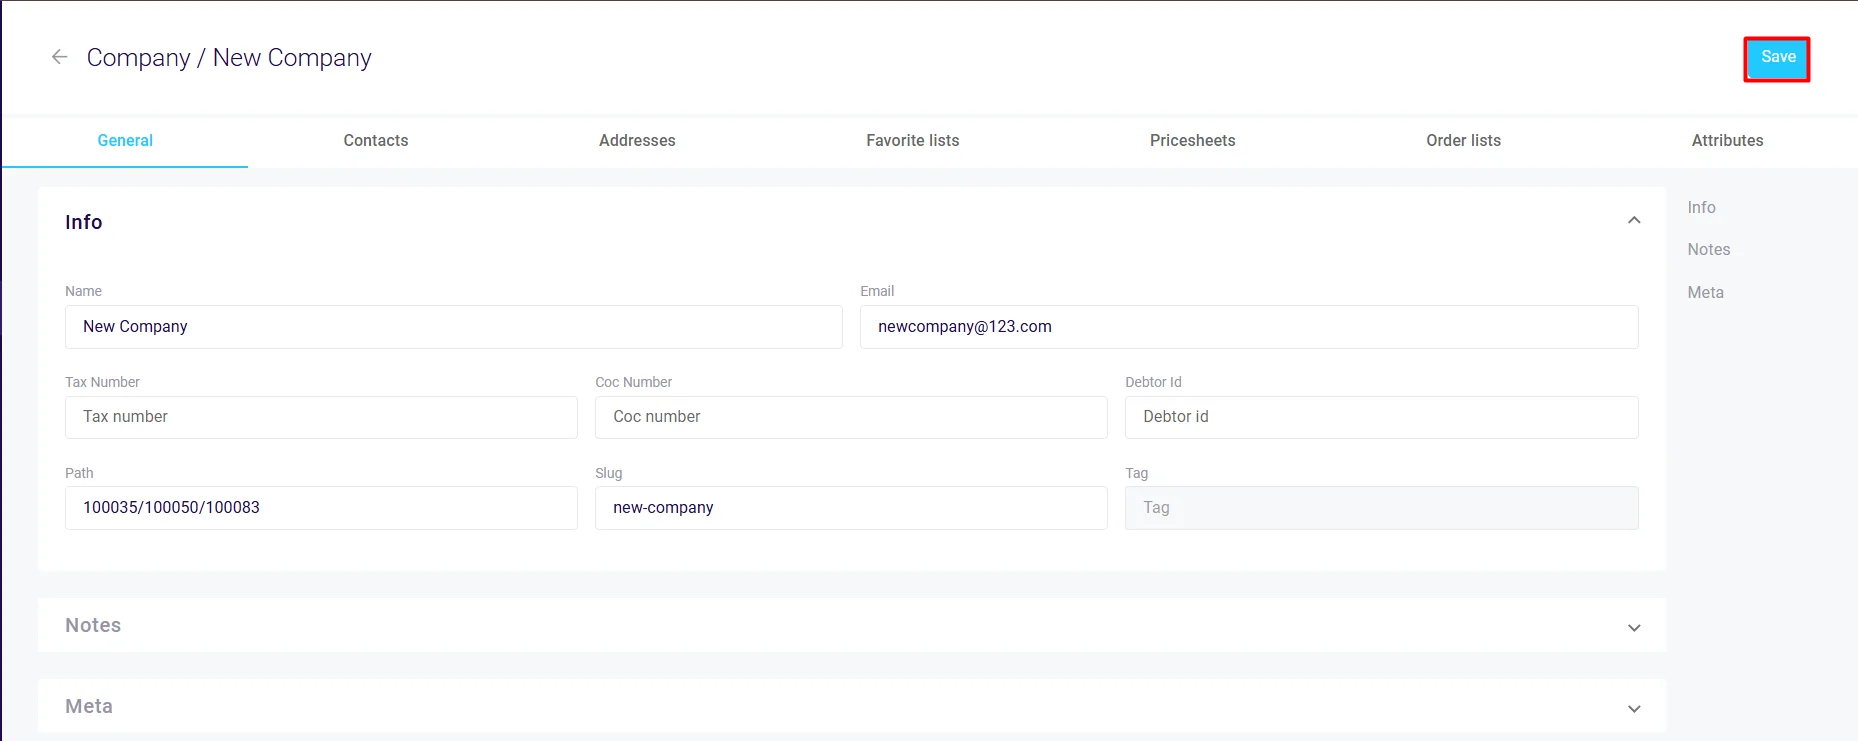
- The new company form opens with tabs for:
- General
- Contacts
- Addresses
- Favorite Lists
- Pricesheets
- Order Lists
- Attributes
Step 3: Enter Company Information
In the General tab, complete the Info section:
- Name: Company name (required)
- Email: Main company email address
- Phone: Primary phone number
- Tax Number: VAT or tax identification number
- CoC Number: Chamber of Commerce registration
- Debtor ID: Internal accounting reference
- Tag: Category or classification
- Hidden: Toggle visibility in searches
Step 4: Add Company Contacts
- Click the Contacts tab.
- Click Add Contact to create new contacts or link existing ones.

- For new contacts, enter:
- Name (first, middle, last)
- Email address
- Phone numbers
- Job title or role
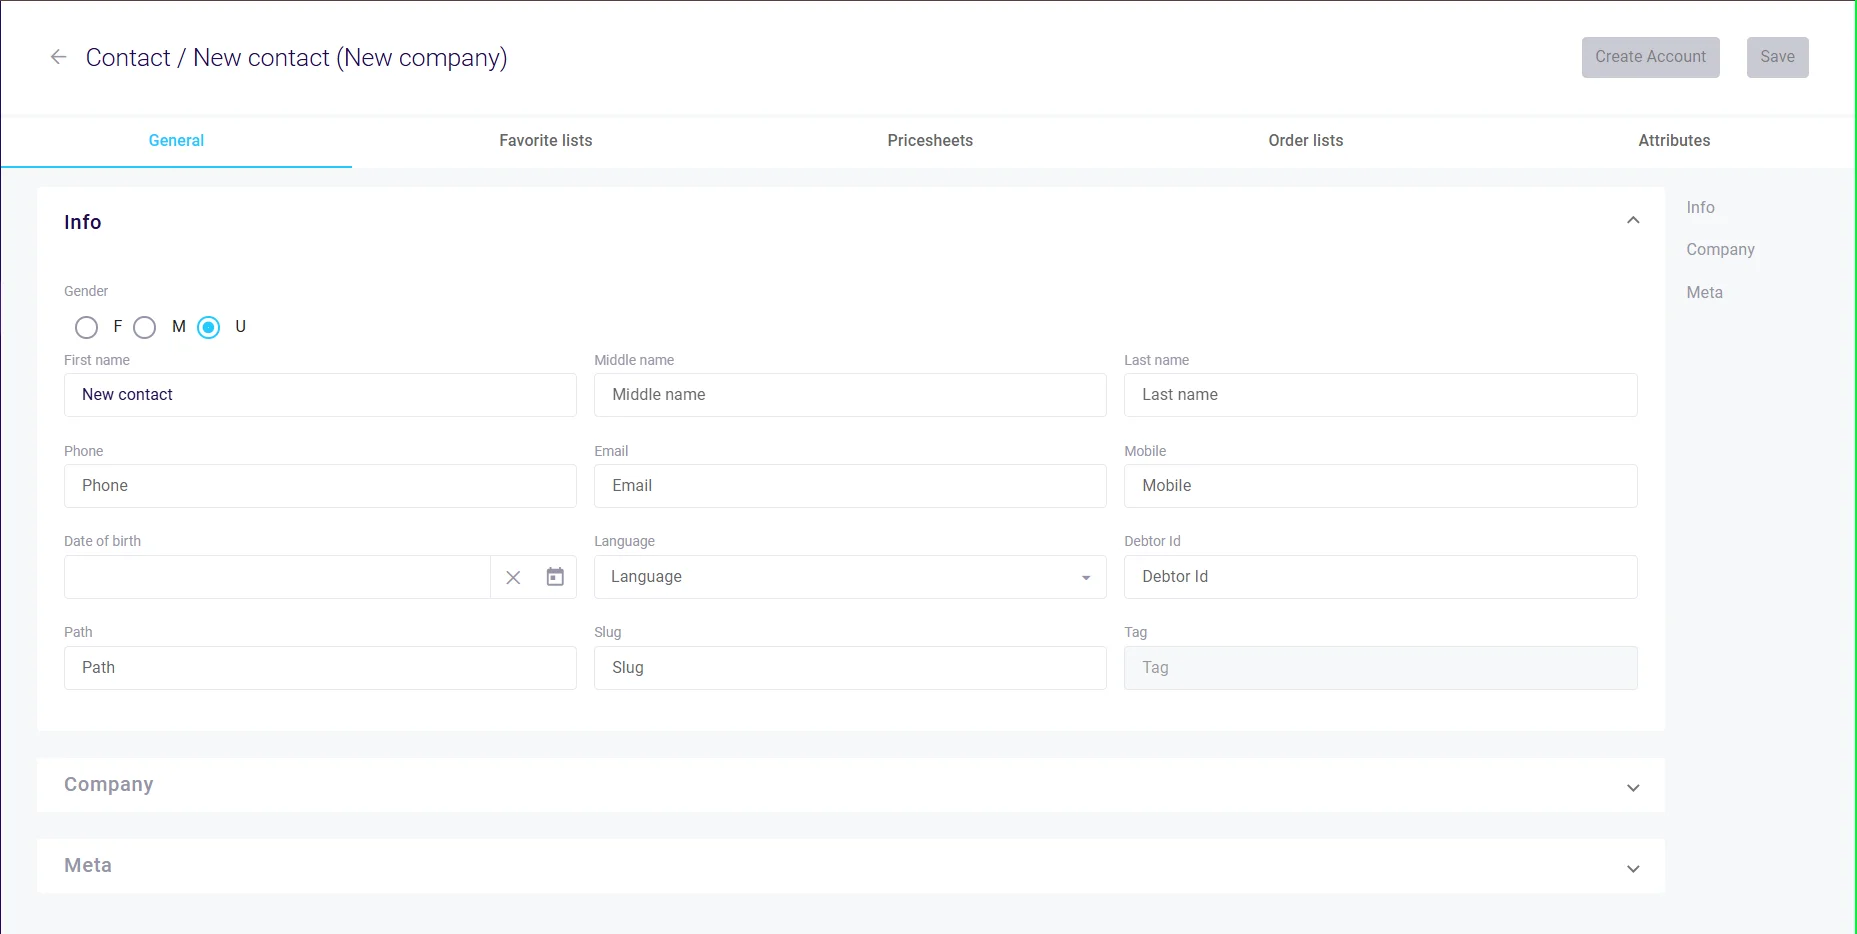
See Create a contact for detailed contact creation steps.
Step 5: Configure Addresses
- Click the Addresses tab.
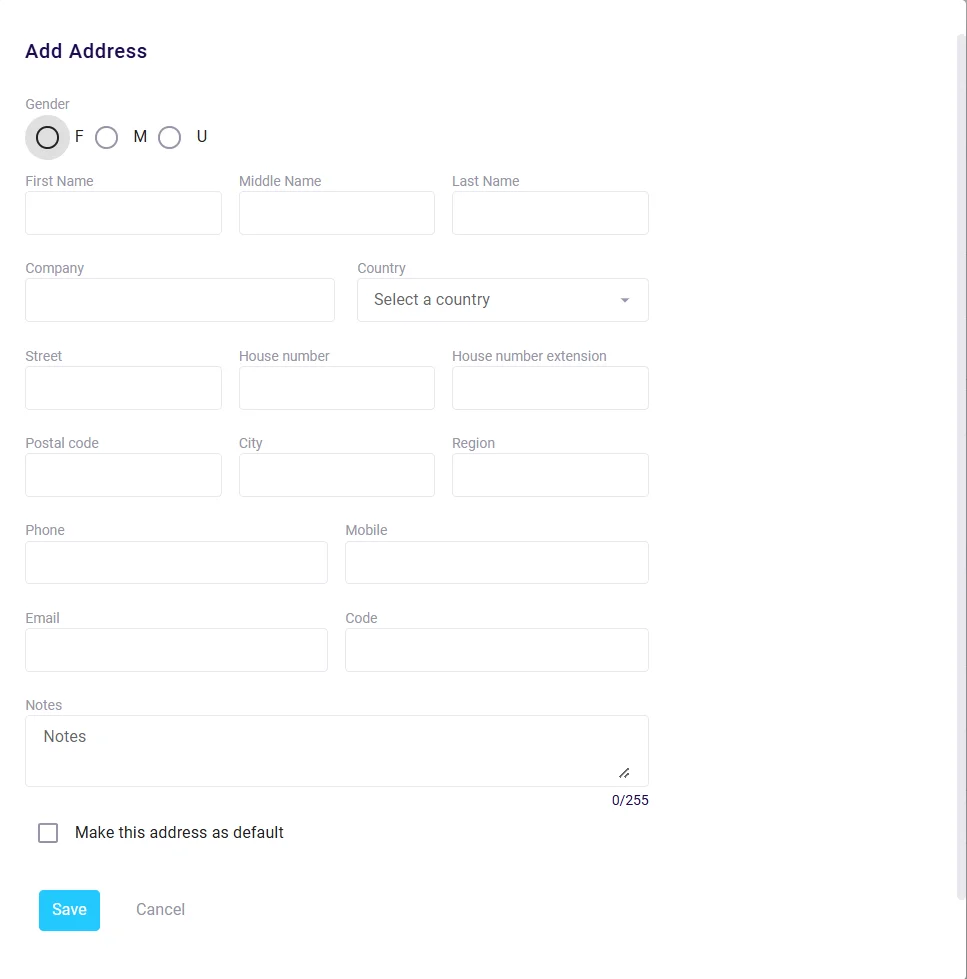
- Click Add Address to create company locations.
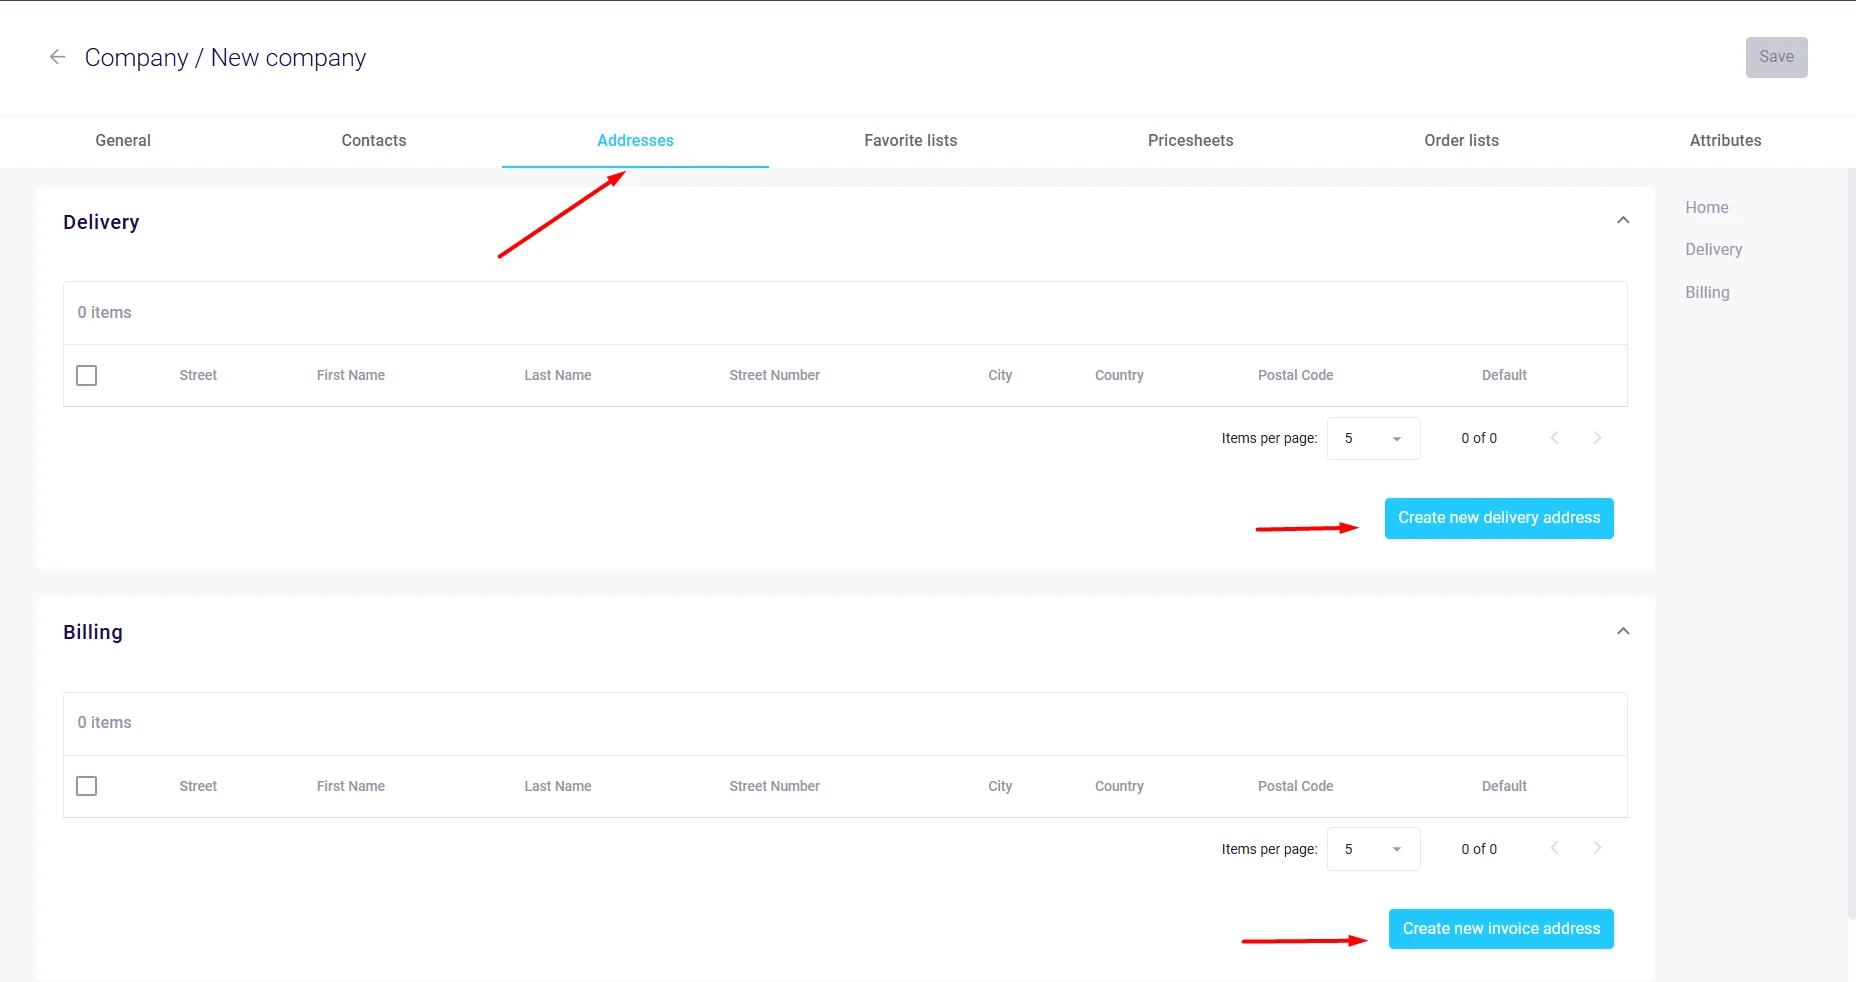
- Enter address details:
- Street address and number
- City and postal code
- Country
- Address type (delivery, invoice)
- Set as default if applicable
Step 6: Set Commercial Configuration
Configure additional tabs as needed:
Favorite Lists
- Assign product favorite lists for quick ordering
Pricesheets
- Link custom pricing agreements
- Apply volume discounts or special rates
Order Lists
- Assign positive or negative order lists
- Control product visibility and ordering permissions
Attributes
- Add custom fields specific to your business
- Examples: Industry type, account manager, credit limit
Step 7: Save the Company
- Click Save at the bottom right.
- A confirmation message appears.
- The new company appears in the companies list.
Next Steps
- Add additional contacts to the company
- Configure user logins for company contacts
- Set up company-specific pricing
- Assign appropriate order lists
- Review and test ordering permissions