Create order lists
Goal
To create order lists that control product visibility and ordering permissions for specific users, companies, or customers. Order lists enable targeted product access management based on business requirements.
Understanding Order List Types
- Positive Order Lists: Users can only see and order products included in the list
- Negative Order Lists: Users cannot see or order products included in the list
Step 1: Navigate to Order Lists
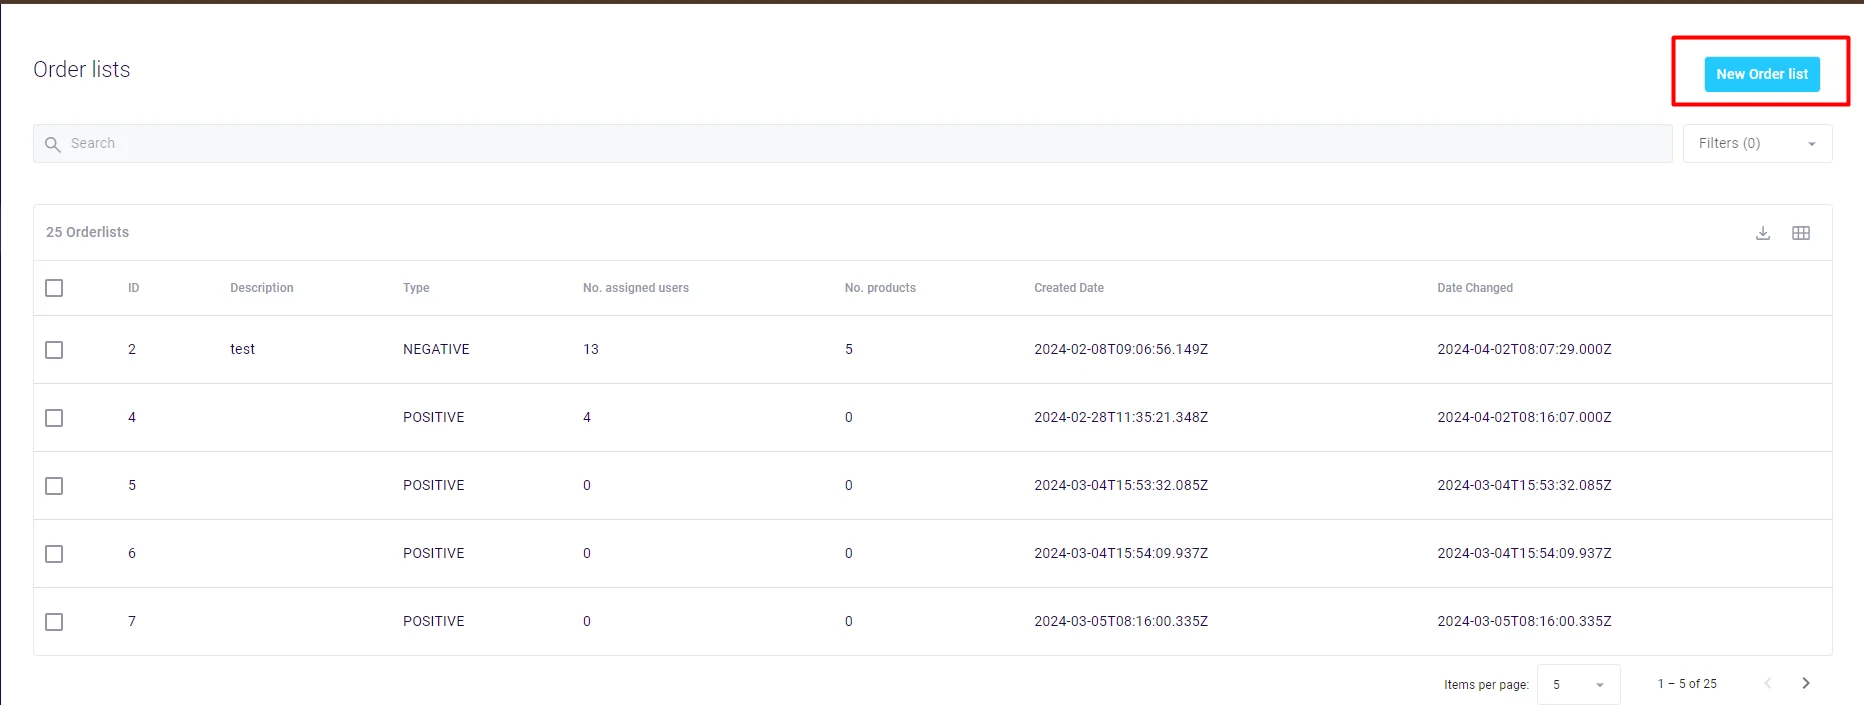
- From the backoffice menu, select User Management > Order Lists.
- Click New order list button in the top right.
Step 2: Configure Order List Settings
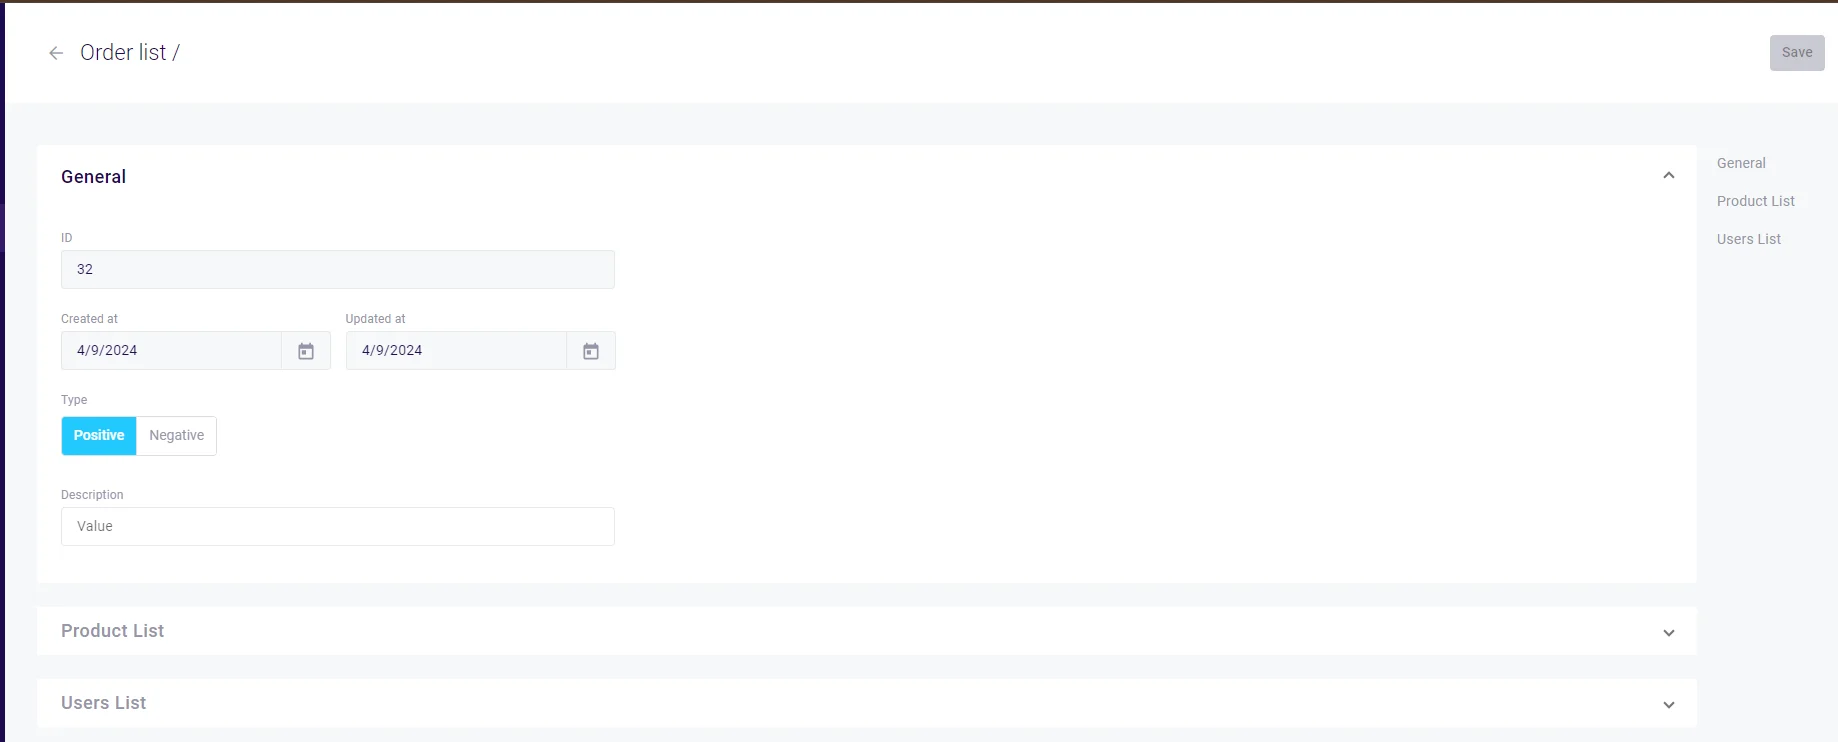
In the order list creation popup:
- General Section:
- ID, creation date, and update date generate automatically
- Select Type: Choose Positive or Negative
- Enter Code: Unique identifier for the order list
- Add Description: Explain the order list purpose (multi-language supported)
Step 3: Add Products
- Navigate to the Product List section.
- Click Add multiple products.
- In the product selection popup:
- Search or browse for products
- Select checkboxes for desired products
- Click Add to order list
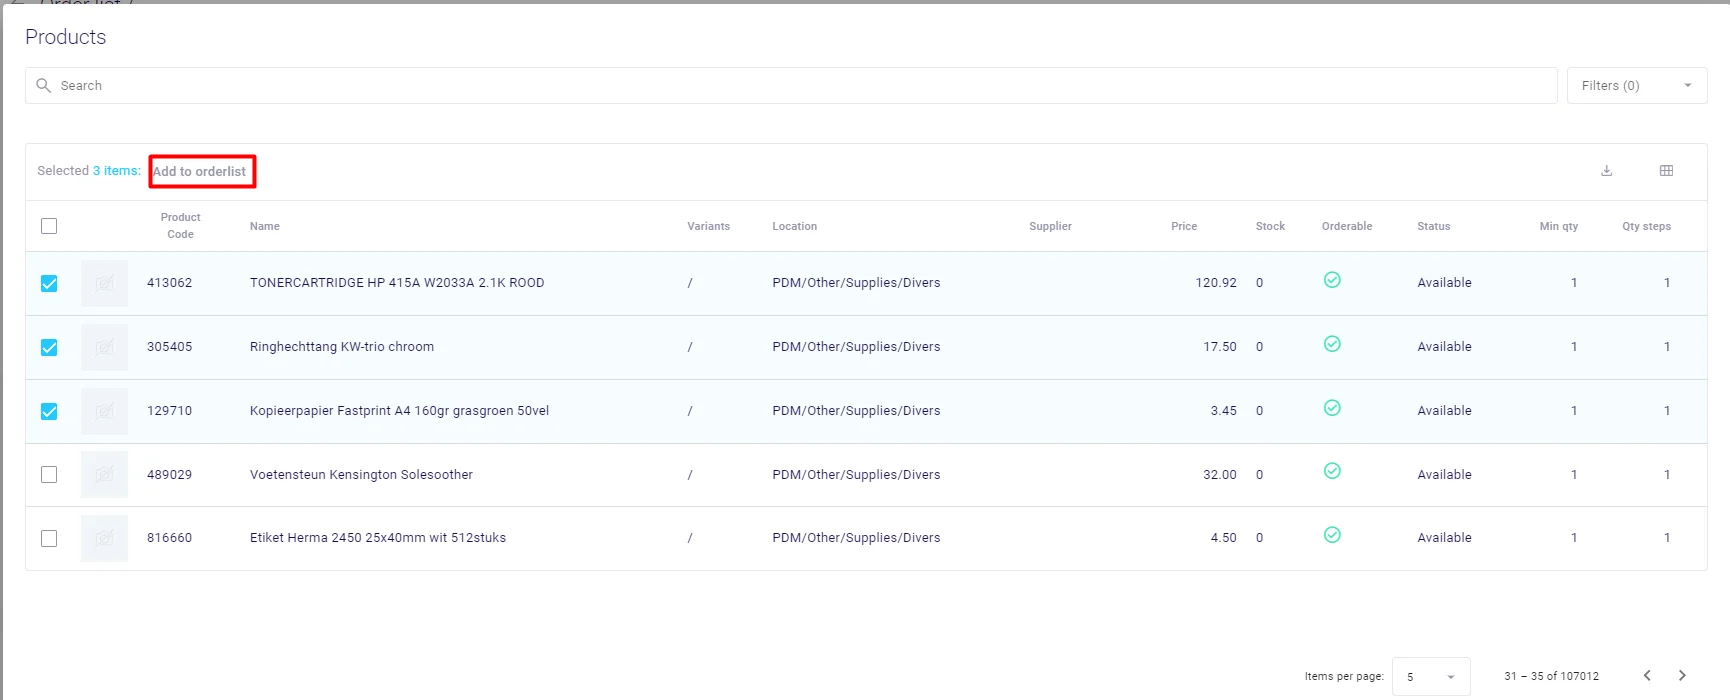
- Selected products appear in the order list.
- To remove products, click the remove button next to each item.
Step 4: Assign Users
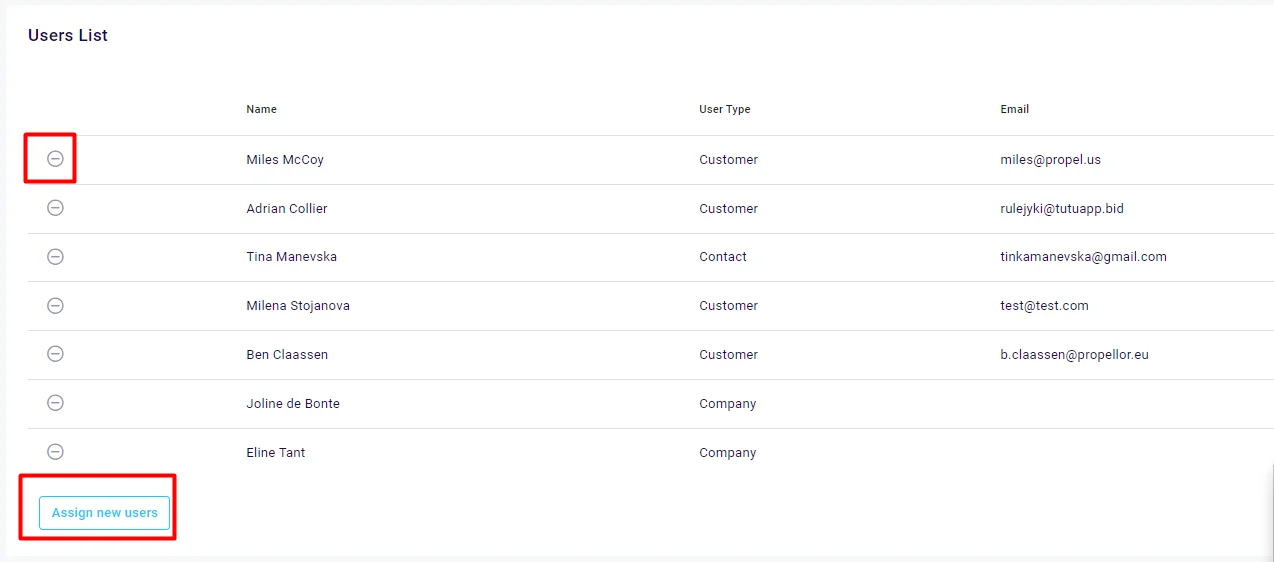
- Navigate to the Users List section.
- Click Assign new users.
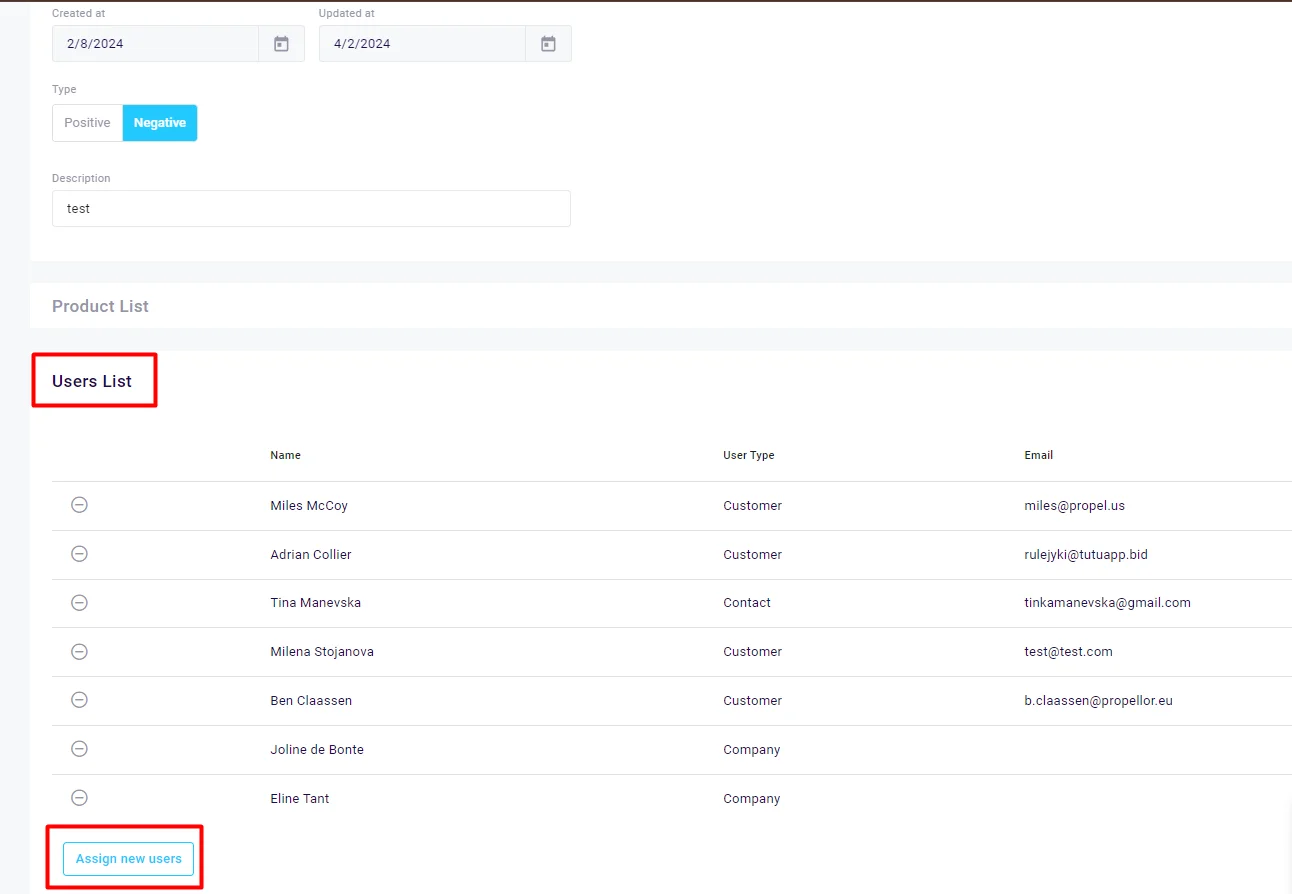
- Select the user type to assign:
- Contact: Individual users
- Company: All contacts within a company
- Customer: B2C customers
- In the selection popup:
- Search or browse available users
- Select checkboxes for assignment
- Click Add to order list
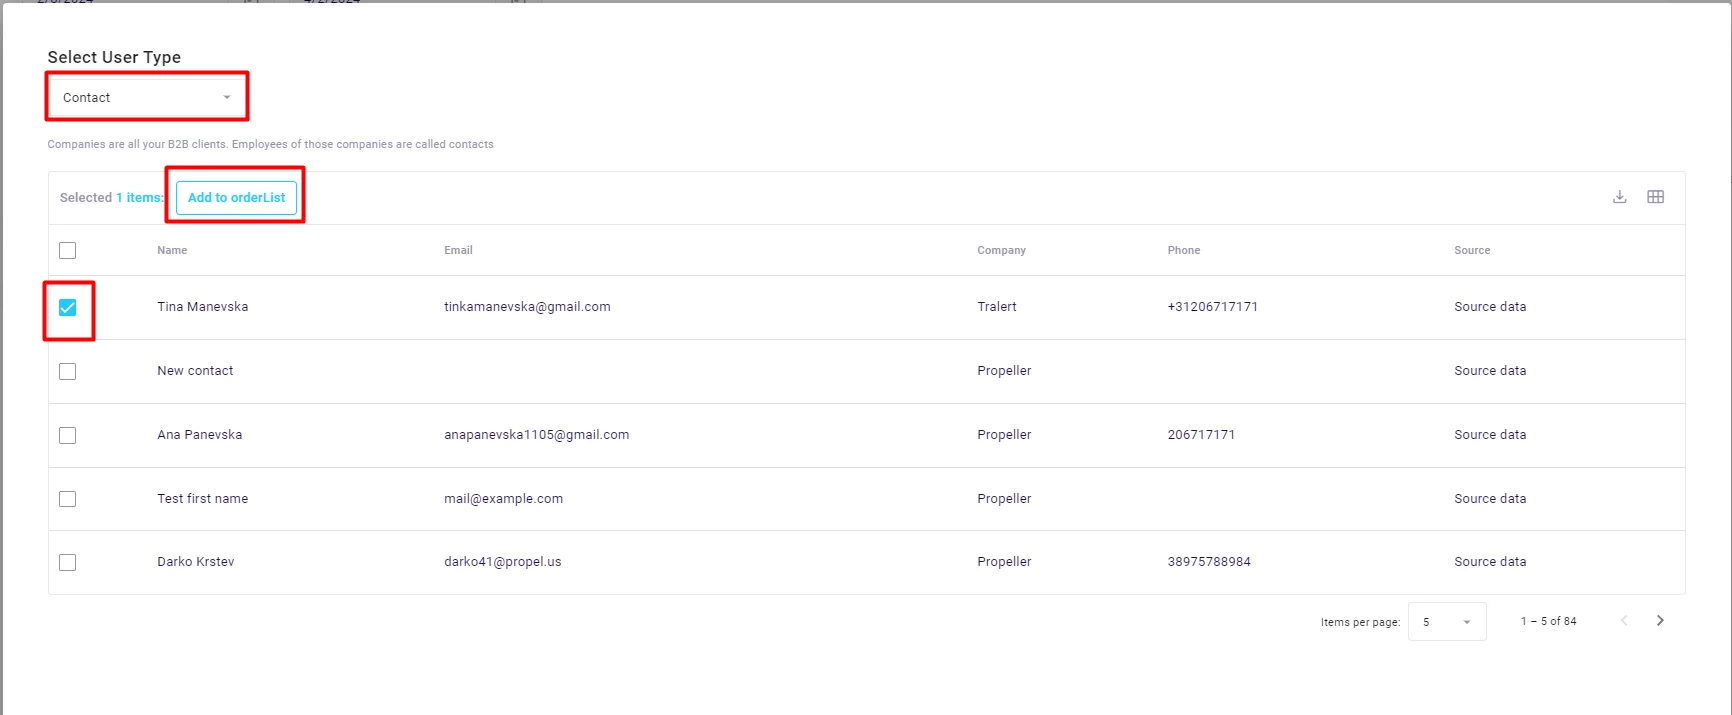
- Assigned users appear in the list.
- Repeat for other user types as needed.
Managing Order Lists
- Edit: Click on an order list to modify products or users
- Active Status: Toggle to enable/disable without deletion
- Remove Users: Click remove button next to assigned users
- Add More: Use the add buttons to expand lists anytime
Common Use Cases
Positive Order List Examples
- Exclusive product catalog for premium customers
- Limited product range for new accounts
- Region-specific product availability
Negative Order List Examples
- Restrict hazardous materials from certain customers
- Hide discontinued products from specific accounts
- Block competitive products for dealer agreements