Create a new warehouse
Goal
To set up a new warehouse in the Propeller backoffice, allowing you to efficiently manage inventory storage, address details, and operational schedules. This ensures better logistics and a seamless customer experience.
Step 1: Navigate to the Warehouses Section
- From the backoffice menu, select Order Management and then Warehouses.
- The Warehouses List will be displayed, showing all existing warehouses along with their details (e.g., Name, Active status, Store, Pickup Location).

Step 2: Click on ‘New Warehouse’
- In the Warehouses list section, click the New Warehouse button at the top right.
- A new screen will open, allowing you to enter the warehouse’s information.

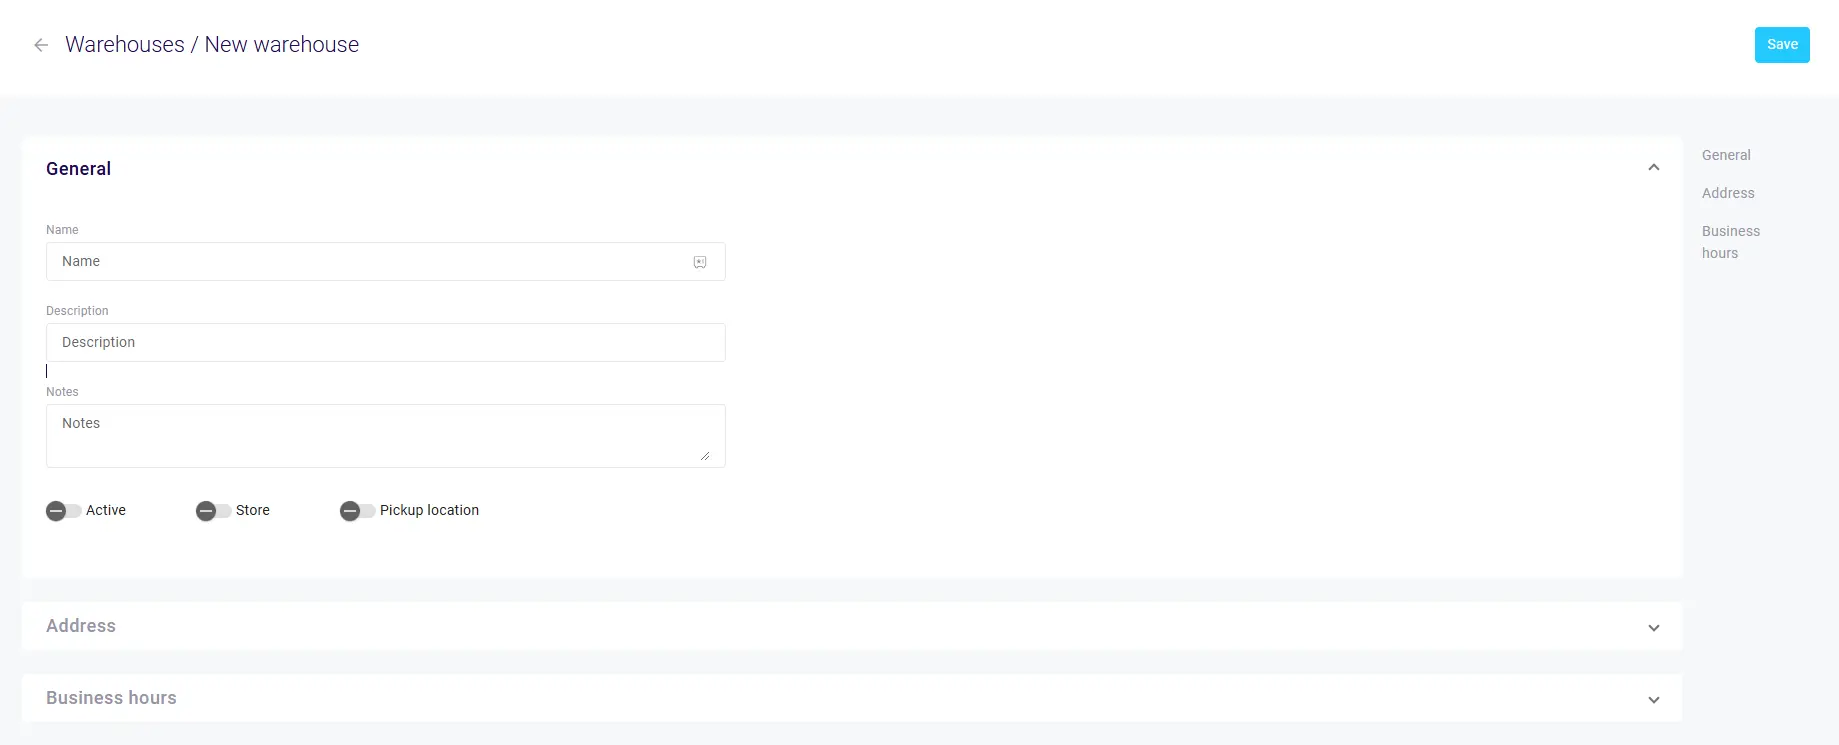
Step 3: Fill in Warehouse Information
- In the
Generaltab:
-
Name: Enter a unique name for the warehouse (e.g., MAIN_WAREHOUSE).
-
Description: Add a brief description of the warehouse’s function (e.g., "Main storage for regional orders").
-
Notes: Add any internal notes for the warehouse (optional).
-
Status: Choose one or multiple warehouse statuses (Active, Store and Pickup location)
- Status Active indicates whether the warehouse is operational and available for use in the system.
- If set to Active, the warehouse is considered functional and can be used for order fulfillment, stock allocation, and shipping.
- If set to Inactive, the warehouse is not available for these processes. This is useful for:
- Temporary closures (e.g., maintenance or seasonal inactivity).
- Decommissioning a warehouse while retaining its historical data.
- Status Store identifies if the warehouse is associated with a specific store or shop location.
- If enabled, the warehouse is tied to a specific retail location or store, allowing it to serve as a stock source for that store.
- Typically used for multi-store setups where each store has its own dedicated warehouse for inventory management.
- This setting ensures accurate stock allocation and reporting per store.
- Status Pickup Location defines whether the warehouse can be used as a pickup point for customers.
- If enabled, customers can select this warehouse as a pickup location during checkout.
- This is often used for Click & Collect or In-Store Pickup services.
- Useful for warehouses that are geographically close to customers or serve as regional distribution hubs.
- Status Active indicates whether the warehouse is operational and available for use in the system.
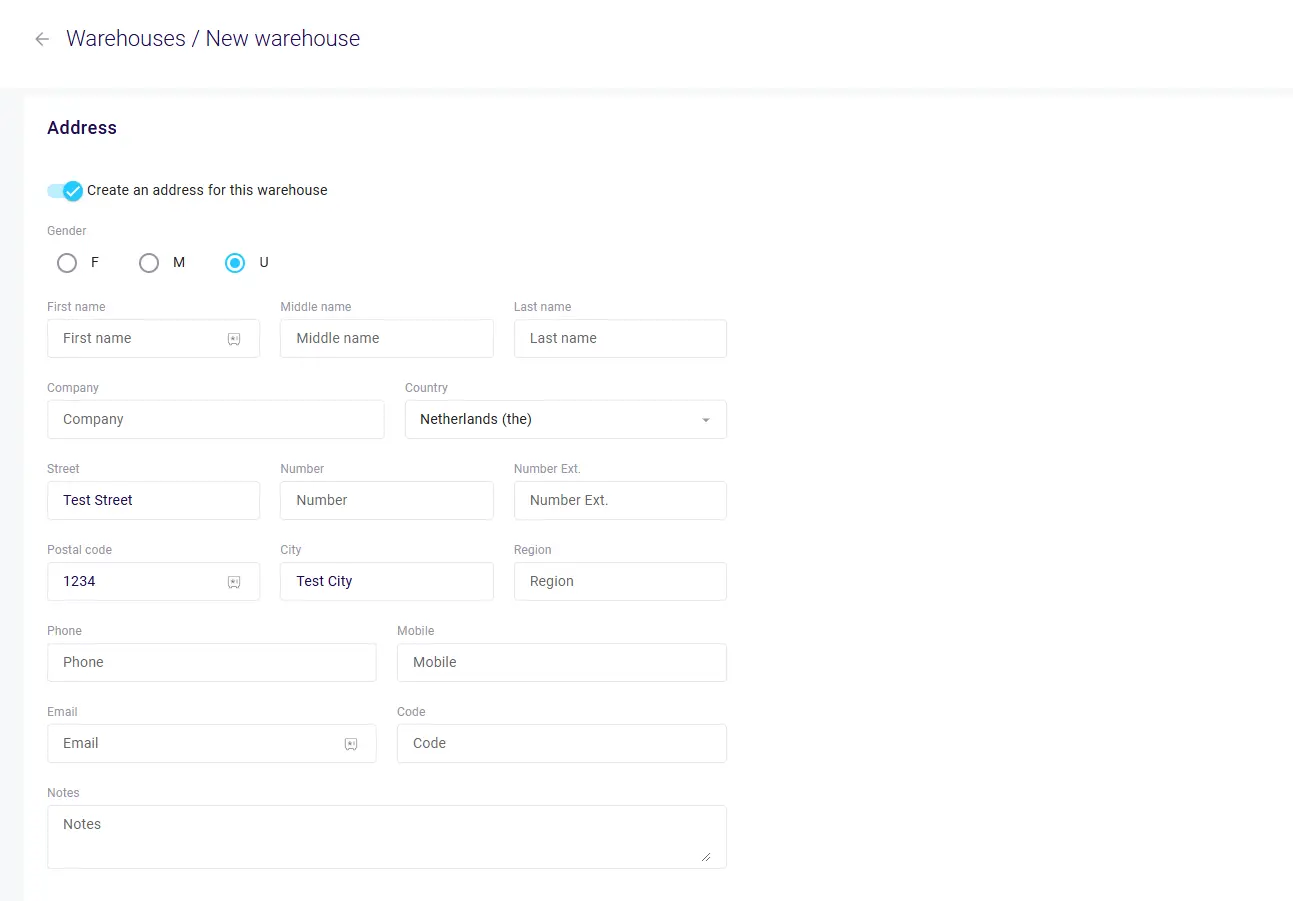
Step 4: Fill in Warehouse's Address Details
- Switch to the
Addresstab:
Enter the warehouse’s physical address, including:- Street
- City
- Postal Code
- Country
Ensure accuracy, as this address may be used for delivery and logistics.

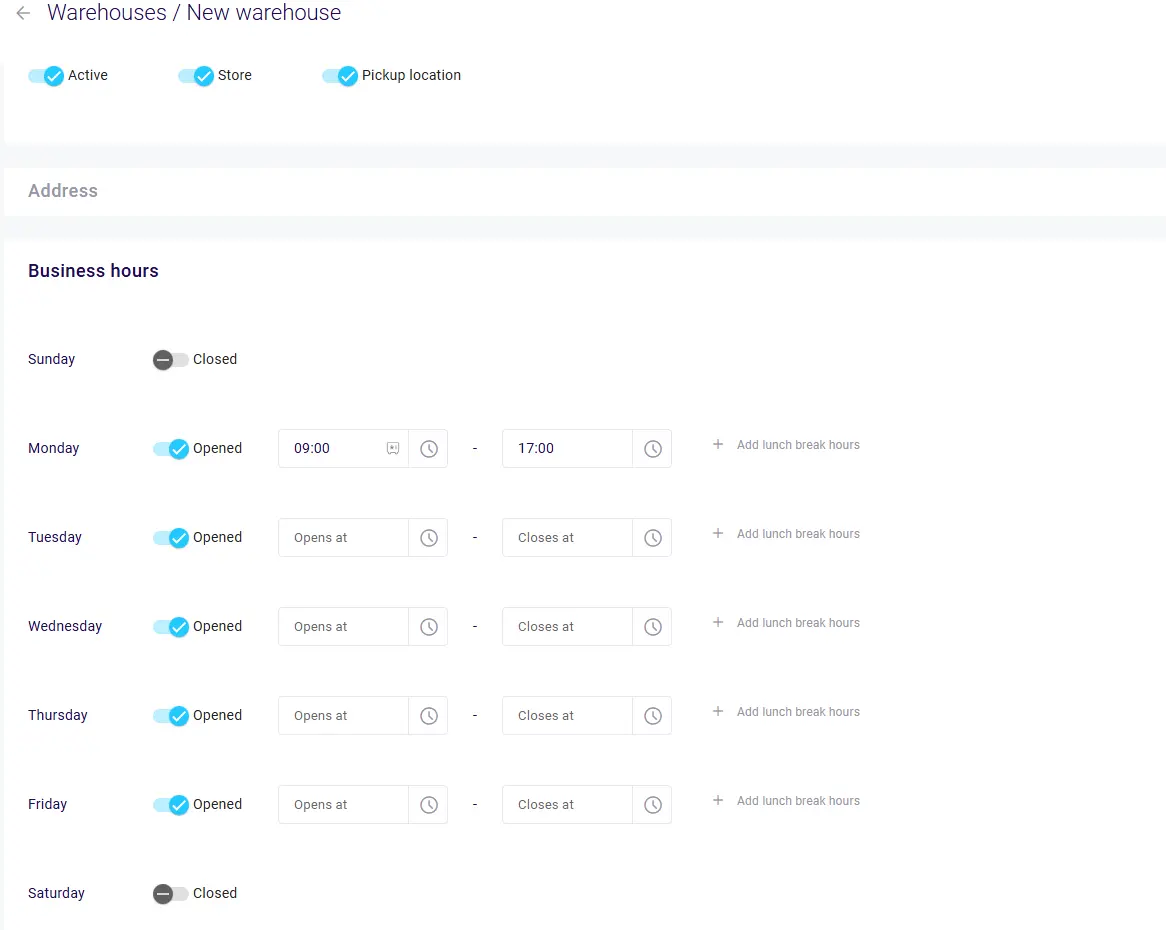
Step 5: Define Business Hours
- Go to the
Business Hourstab:
- Set the operational hours for the warehouse (e.g., Monday to Friday, 9:00 AM - 5:00 PM).

Step 6: Save the New Warehouse
Once all the details are entered, click the Save button at the top right corner of the screen. A confirmation message will appear, indicating that the new warehouse has been successfully created. The warehouse will now be listed in the Warehouses List.
Best Practices
- Consistency: Use a standardized naming convention for warehouses to make them easily identifiable.
- Address Validation: Verify that the address entered is accurate to avoid logistical errors.
- Regular Updates: Periodically review warehouse details, especially business hours and notes, to ensure they remain current.
- Access Control: Limit who can create or modify warehouses to prevent unauthorized changes.
- Integration: Link the new warehouse to relevant carriers, rules, and products for seamless operation.