Create a new order status
Goal
To set up new order statuses in the Propeller backoffice, managing the flow of orders from quotation requests to order fulfillment and archival. Customizing these statuses ensures alignment with your webshop's processes.
Step 1: Navigate to the Order Statuses
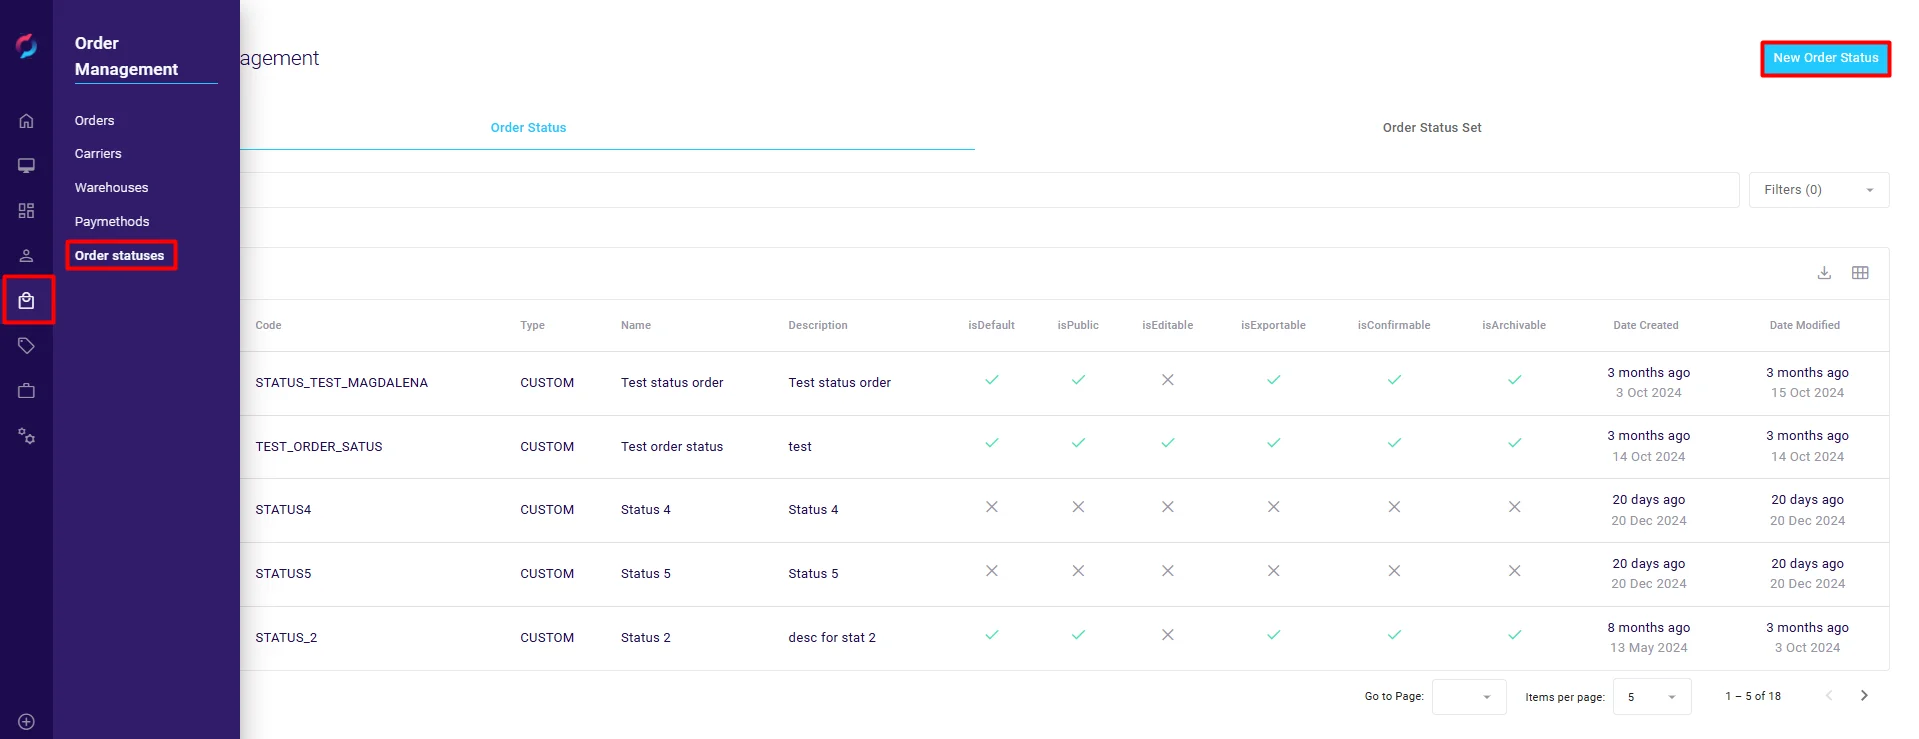
- From the backoffice menu, select Order Management and then Order Statuses.
- In the Order Status Management section, you will see a list of existing order statuses with filters and search functionality.

Step 2: Click on ‘New Order Status'
- Click the New Order Status button in the top right corner.
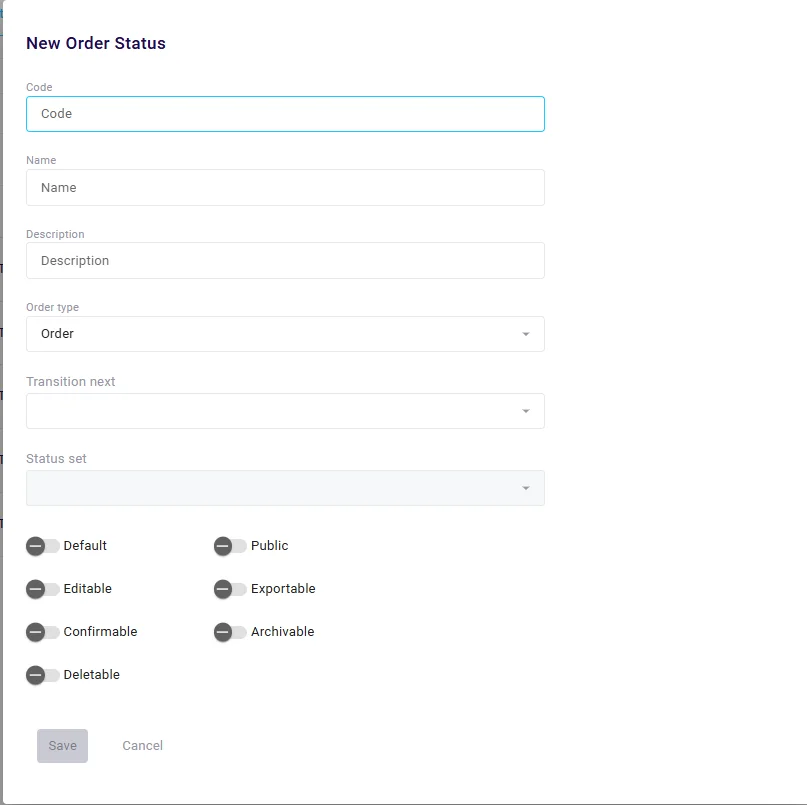
- A popup window titled New Order Status will appear.

Step 3: Fill in Order Status Details
-
Complete the required fields in the popup:
- Code: Enter a unique identifier for the status (e.g.,
STATUS_PENDING). This is mandatory. - Name: Enter the display name for the status (e.g.,
Pending Order). - Description: Provide a description of the status to clarify its purpose.
- Order Type: Select the type of order this status applies to.
- Transition Next: Define the next possible status(es) for this status in workflows.
- Status Set: Assign this status to a status set to group related statuses.
- Code: Enter a unique identifier for the status (e.g.,
-
Adjust the following settings as needed:
- Default: Defines an initial order status per order type instead of having it hardcoded (e.g., currently set to “NEW”). As of now, it acts as a marker, but it may be implemented in the future.
- Public: Marks if orders with this status are visible to customers in the webshop/portal (e.g., hide drafts).
- Editable: Determines if orders in this status can be modified.
- Deletable: Indicates if orders in this status can be deleted (e.g., drafts vs finalized orders).
- Exportable*: Flags if orders with this status can be picked up by integrations (e.g., ERP systems).
- Confirmable*: Specifies if orders in this status can be confirmed (e.g., paid and placed orders).
- Archivable*: Marks if orders in this status can be archived, typically for completed orders.
* These settings can be used by webshops/portals, but are not mandatory to use and potentially not implemented in your webshop/portal.
Example:
- Code:
STATUS_SHIPPED - Name:
Shipped - Description:
Order has been shipped and is in transit. - Order Type:
Order - Transition Next:
Delivered - Status Set:
Shipping
Step 4: Save the New Order Status
- Click Save to add the new order status.
- A confirmation message will appear, indicating the status was successfully created.
Best Practices
- Use Descriptive Codes and Names: Ensure codes and names clearly represent the status to avoid confusion.
- Leverage Status Sets: Group statuses into sets for streamlined management and consistency across workflows.
- Define Workflow Transitions: Specify clear next steps for each status to enable smooth order progression.