Importing data into Propeller using CSV
Goal
Propeller allows users to import and enrich data using CSV files, streamlining the process of managing various types of data in bulk. This guide walks you through the import process step-by-step using products as an example.
Step-by-Step Guide
Step 1: Choose Type of Data to Import
- Navigate to the Data Import section in the Propeller backoffice.
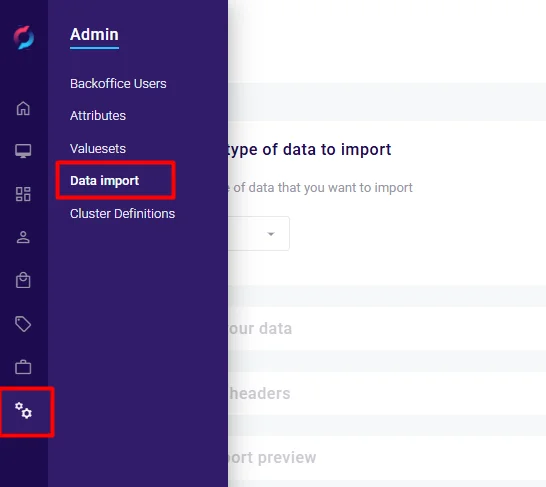
-
Select the appropriate data type (e.g., Products).
-
Download a sample CSV file for reference:
- Product ID CSV: Use this template if you want Propeller to generate the product ID's, which are used for future reference when adjusting or enriching products.
- Source ID CSV: Use this template if products are identified by a source system, where a source name and ID are used to reference these imported products.
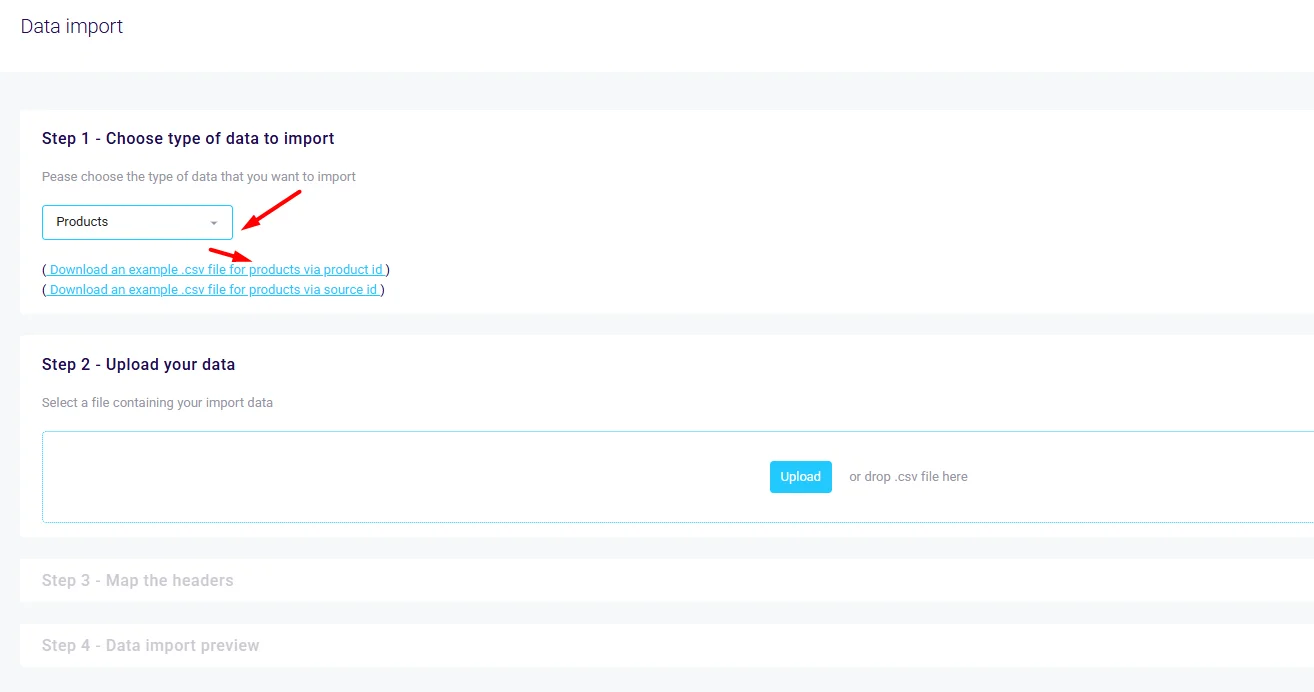
Step 2: Upload Your CSV File
- Prepare your CSV file based on the downloaded template.
- Click Upload Data and select your CSV file.
- The uploaded file will appear in the import list with its name and size.
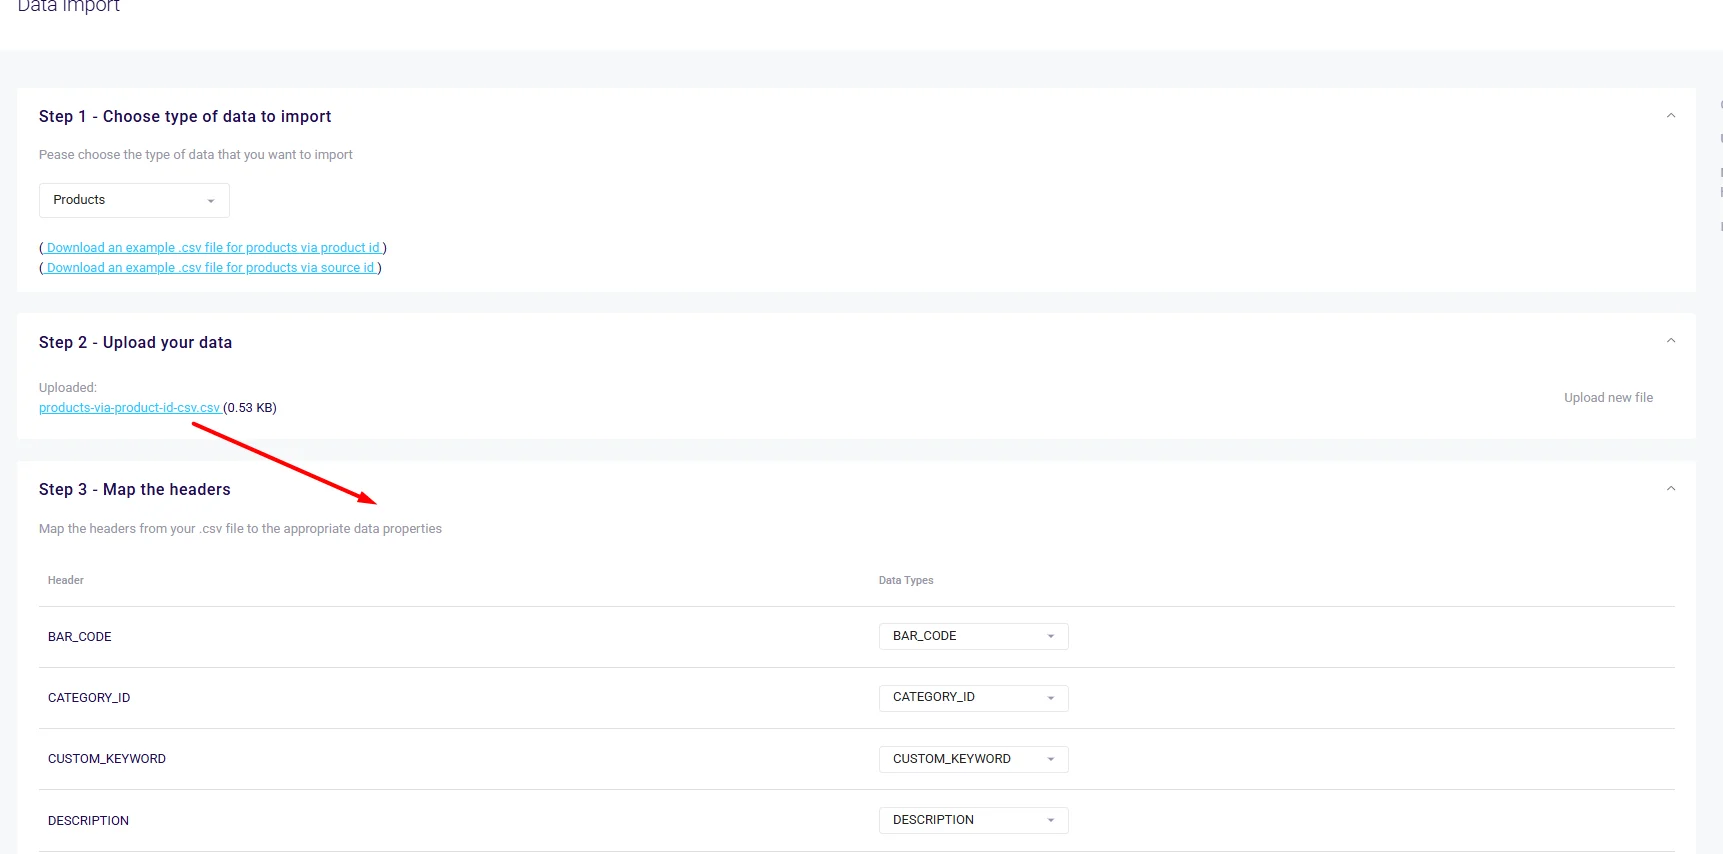
Step 3: Map the Headers
- Review the headers from your CSV file.
- Match each CSV column to the appropriate Propeller data property. If the CSV template was used correctly, the columns will be mapped automatically. Some example columns:
- CATEGORY_ID → Category ID
- PRODUCT_ID → Product ID (only filled if you want to update existing products)
- LANGUAGE → Language
- PRIORITY → Priority
- Ensure all required fields are mapped correctly before proceeding.
Step 4: Preview and Import Data
- Click Confirm Import to finalize the process.
- Review whether the import was succesful, or whether there are any error messages.
- Once the import is successful, verify your data in the respective module (e.g., PIM > Products).
Best Practices
- When you import products and categories via CSV, they won’t appear instantly. If the CSV importer shows a success message, please give it some time before changes are reflected in the backoffice. You can however already start importing e.g. prices on those products, even if they are not visible yet.
- Use the provided CSV templates to ensure correct formatting.
- Validate data before uploading to minimize errors.
- Review imported data in the corresponding module to confirm accuracy.