Manage backoffice users
Goal
To create and manage backoffice users in Propeller Commerce, assigning appropriate roles and permissions for secure, controlled access to various modules within the system.
Understanding Backoffice Users
Backoffice users are administrative users who manage different aspects of your Propeller Commerce platform. Each user can be assigned specific roles that determine their access level to various modules.
Access Levels
Each role can have one of three access levels:
- Viewer: Read-only access - can view items but cannot create or edit
- Editor: Can edit items
- Owner: Full privileges - can create, edit, and delete items
Generic Access Roles
- Sales management: Provides access to the Sales Portal for managing quotes and orders
- Backoffice management: Provides access to core administrative functions
Available Modules
The system includes the following management modules:
- User management: Manage contacts, customers, and companies
- Shop & channel management: Configure shops, channels, and related settings
- Role & permission management: Manage user roles and permissions
- Pricing management: Configure pricing, pricesheets, and discounts
- Logistics management: Manage warehouses, carriers, and inventory
- Configuration management: System configuration and settings
- Product Data management: Manage products, categories, and attributes
- Order Data management: Access to order data and reporting
Step 1: Navigate to Backoffice Users
- From the main menu, select Admin.
- Click on Backoffice Users.
- You'll see a list of existing backoffice users showing:
- User ID
- Name
- Email address
- Date created
- Date last updated
Step 2: Create a New Backoffice User
- Click the New Backoffice User button in the top right corner.
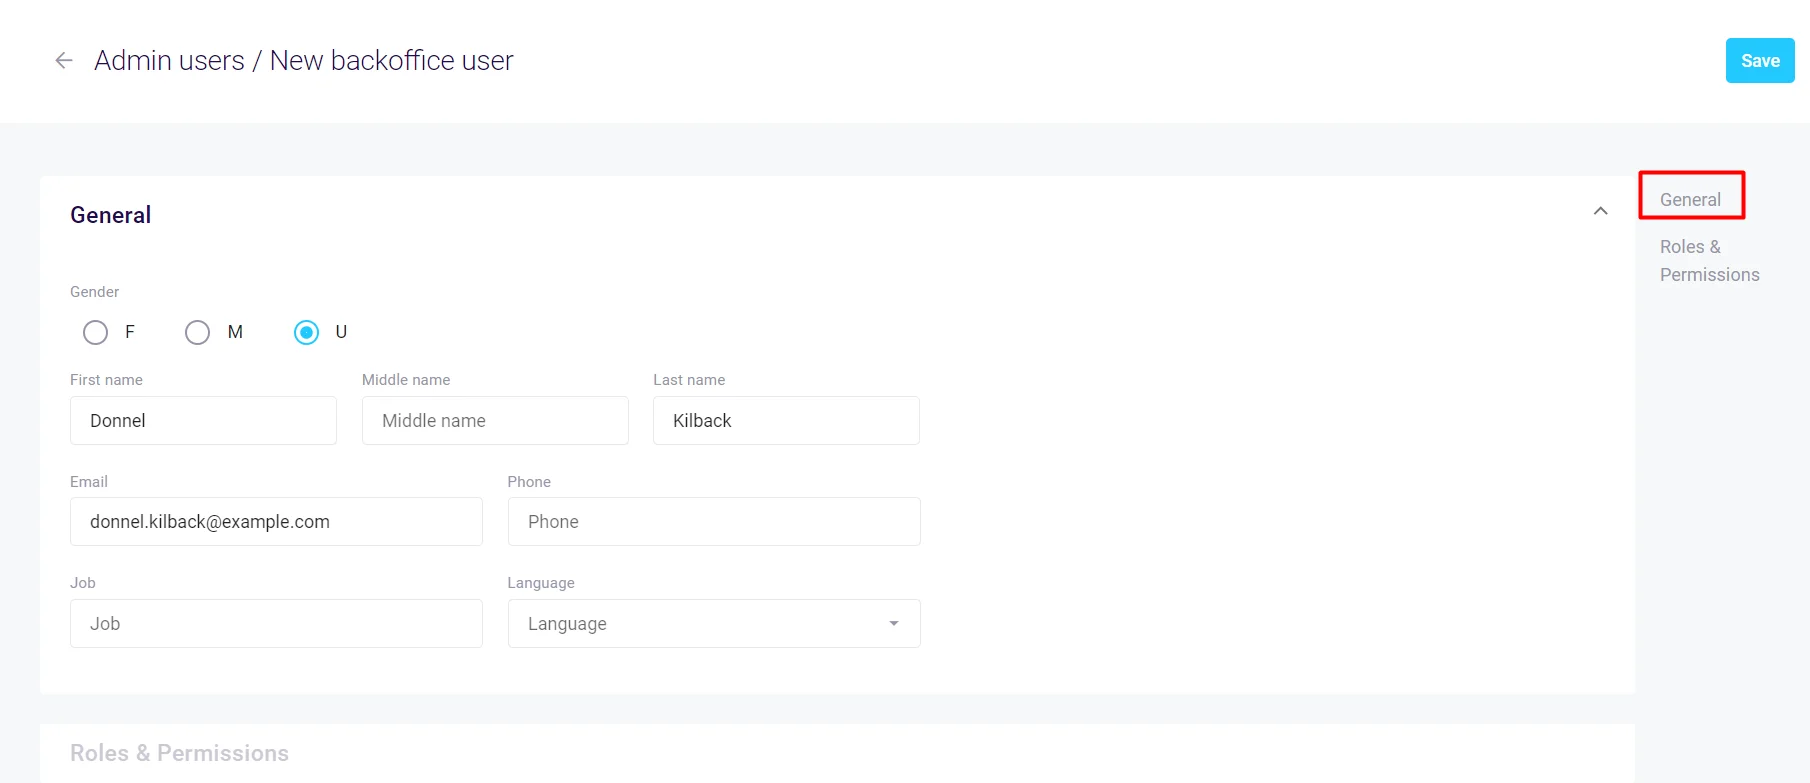
- The new user form will open with three tabs:
- General
- Roles & Permissions
- Information
Step 3: Fill in General Information
In the General tab, provide the following details:
Personal Information
- Gender: Select F (Female), M (Male), or U (Unknown)
- First name: User's first name (required)
- Middle name: User's middle name (optional)
- Last name: User's last name (required)
Contact Information
- Email: User's email address (required) - this will be used for login
- Phone: User's phone number (optional)
Work Information
- Job: User's job title or position (optional)
- Language: Select the user's preferred language from the dropdown (defaults to the system language)

Step 4: Assign Roles and Permissions
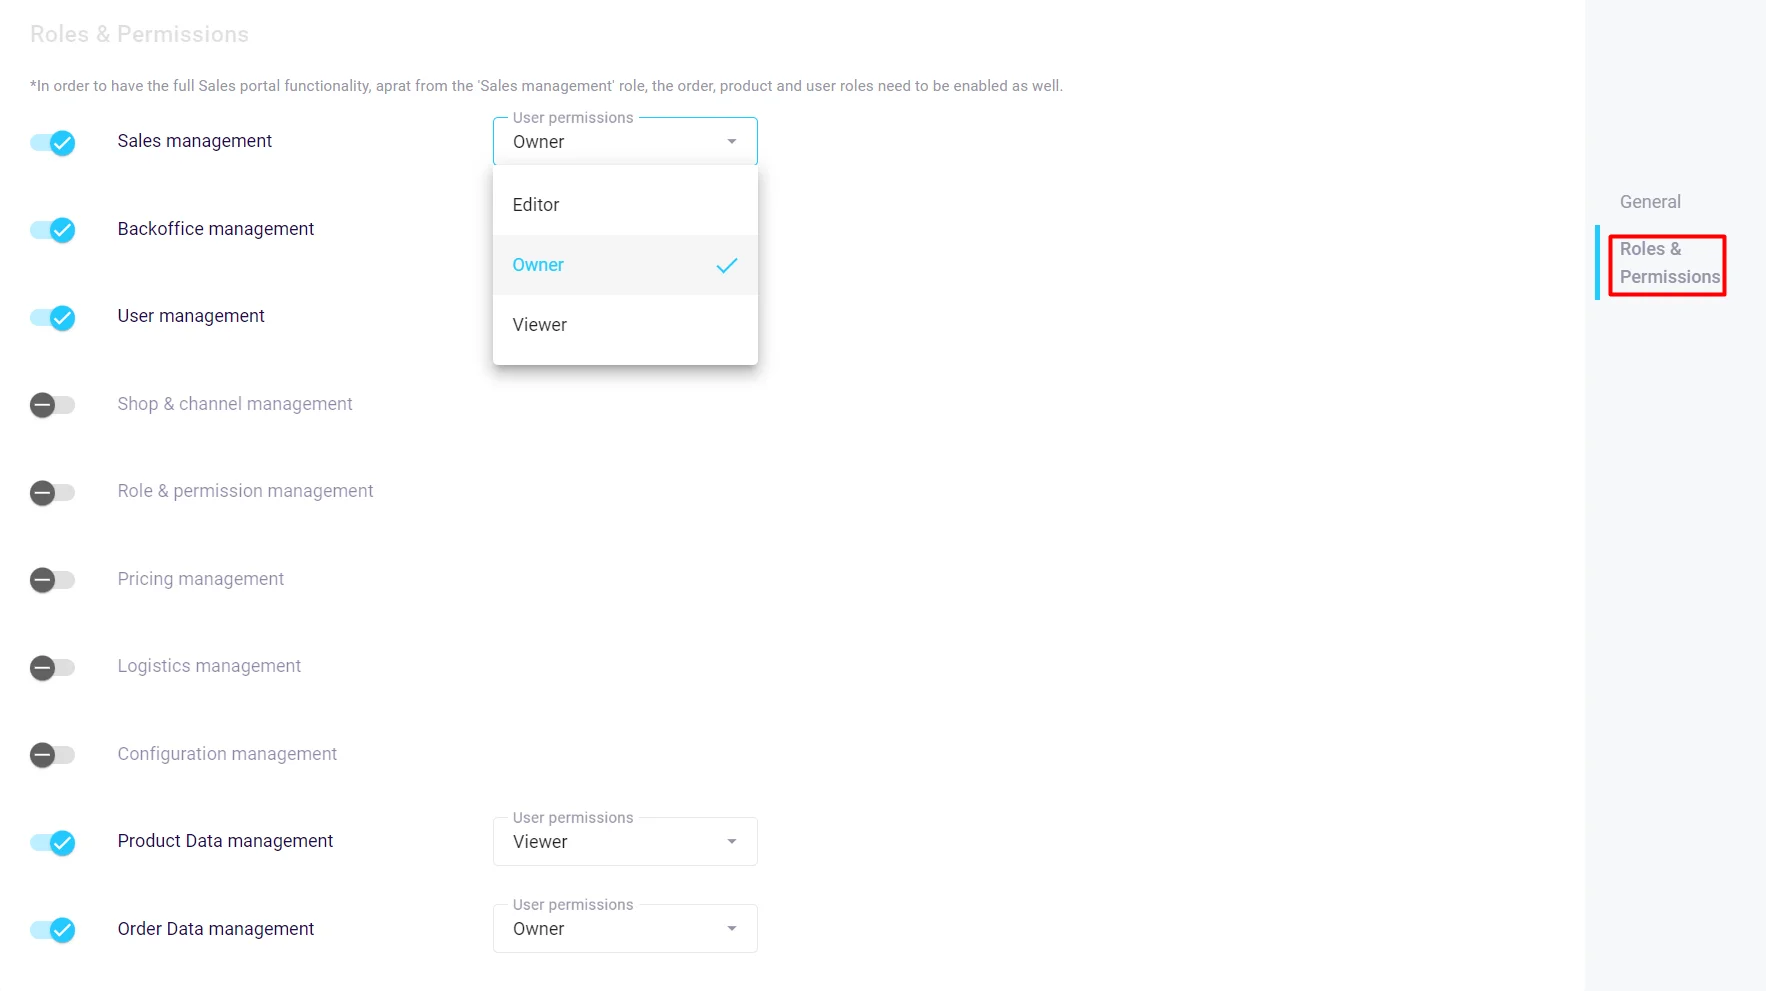
- Switch to the Roles & Permissions tab.
- For each module, select the appropriate access level from the dropdown:
- Owner: Full access
- Editor: Edit access
- Viewer: Read-only access
- (no selection): No access to this module
Important Notes:
- Sales Portal Access: To grant full Sales Portal functionality, ensure you enable:
- Sales management role (required)
- Order Data management (for viewing and managing orders)
- Product Data management (for product information)
- User management (for customer information)

Step 5: Save the User
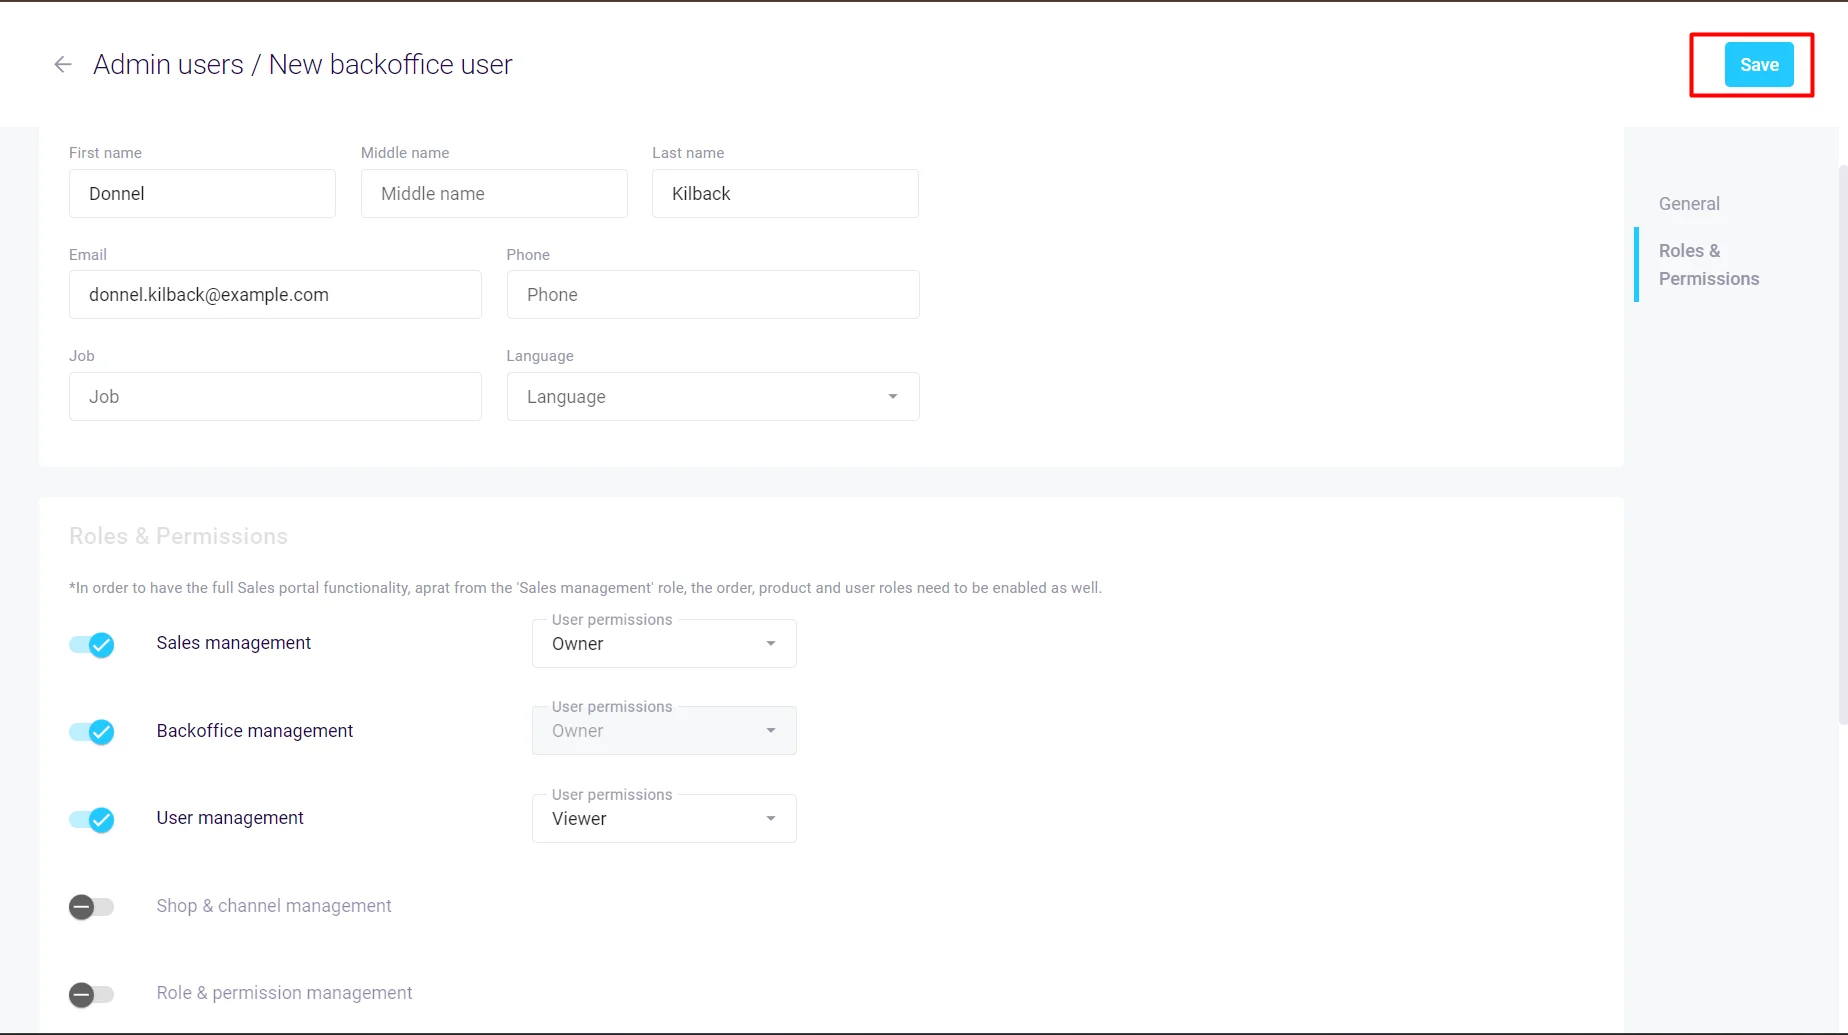
- After configuring all settings, click the Save button in the top right corner.
- The system will create the backoffice user with the specified permissions.

Step 6: User Activation
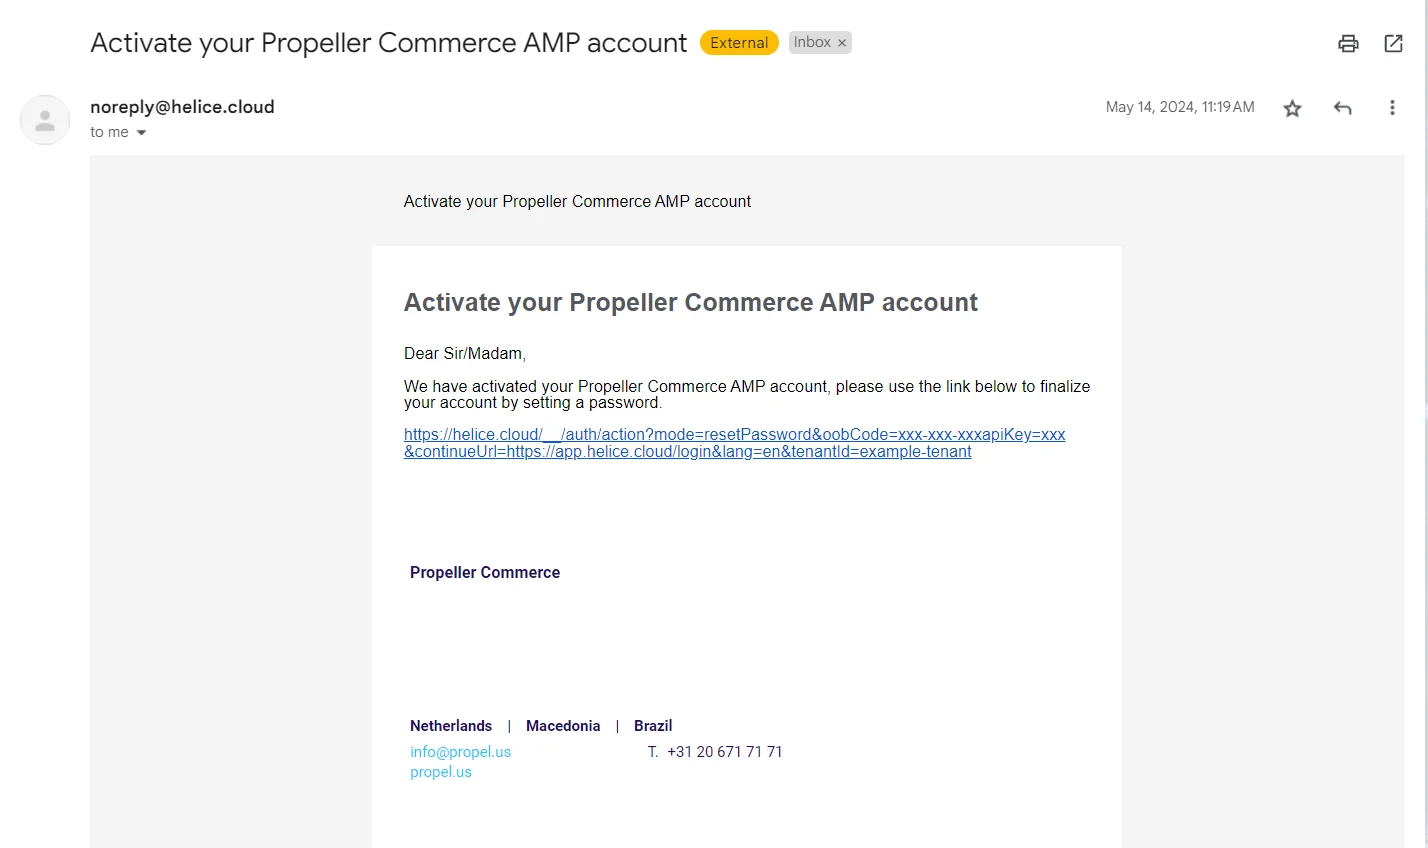
- The new backoffice user will receive an activation email at the provided email address.
- The email contains a link to set up their password and activate their account.
- Once activated, the user can log in using their email address and chosen password.

Editing Existing Users
To modify an existing backoffice user:
- Click on the user's row in the Backoffice Users list.
- The edit form will open with the current settings.
- Make necessary changes to:
- General information
- Role assignments and access levels
- Click Save to apply the changes.
Managing User Access
Disabling a User
To temporarily disable a user's access without deleting their account:
- Edit the user
- Remove all role assignments
- Save the changes
Changing Access Levels
- Navigate to the user's Roles & Permissions tab
- Change the dropdown selection for specific modules
- Save to apply the new permissions immediately
Role Functionality Reference
| Menu Item | Submenu Item | Role Required |
|---|---|---|
| Sales | Sales management | |
| Companies | User management | |
| Requests | Order Data management | |
| Quotes | Order Data management | |
| Orders | Order Data management | |
| Product Catalogue | Product Data management | |
| PIM | Product Data management | |
| Products & Clusters | Product Data management | |
| Categories | Product Data management | |
| Users | ||
| Users | User management | |
| Favorites | Shop & channel management | |
| Orderlists | Product Data management | |
| Orders | ||
| Orders | Order Data management | |
| Carriers | Logistics management | |
| Warehouses | Logistics management | |
| Paymethods | Shop & channel management | |
| Order Statuses | Order Data management | |
| Pricing | Pricing management | |
| Pricesheets | Pricing management | |
| Taxes | Pricing management | |
| Surcharges | Pricing management | |
| Incentives | Pricing management | |
| Admin | ||
| Backoffice Users | Role & permission management | |
| Attributes | Configuration management | |
| Valuesets | Configuration management | |
| Data Import | Configuration management | |
| Cluster Definitions | Product Data management | |
| Event Actions | Configuration management | |
| Templates | Configuration management | |
| Login tokens | Configuration management |
Best Practices
- Principle of Least Privilege: Assign only the minimum access required for each user's role
- Regular Reviews: Periodically review user access levels and remove unnecessary permissions
- Documentation: Keep a record of why specific permissions were granted to users