Create a new surcharge
Goal
To create and manage surcharges in the Propeller backoffice, enabling you to apply additional fees to products such as deposits for recyclable items, environmental fees or handling charges.
Step 1: Navigate to Surcharges
- From the backoffice menu, select Pricing and then Surcharges.
- You'll see a list of existing surcharges displaying:
- Name
- Type
- Value
- Tax Code
- Tax Zone
- Status (Enabled/Disabled)
- Valid From/To dates

Step 2: Create a New Surcharge
- Click the New Surcharge button in the top right corner.
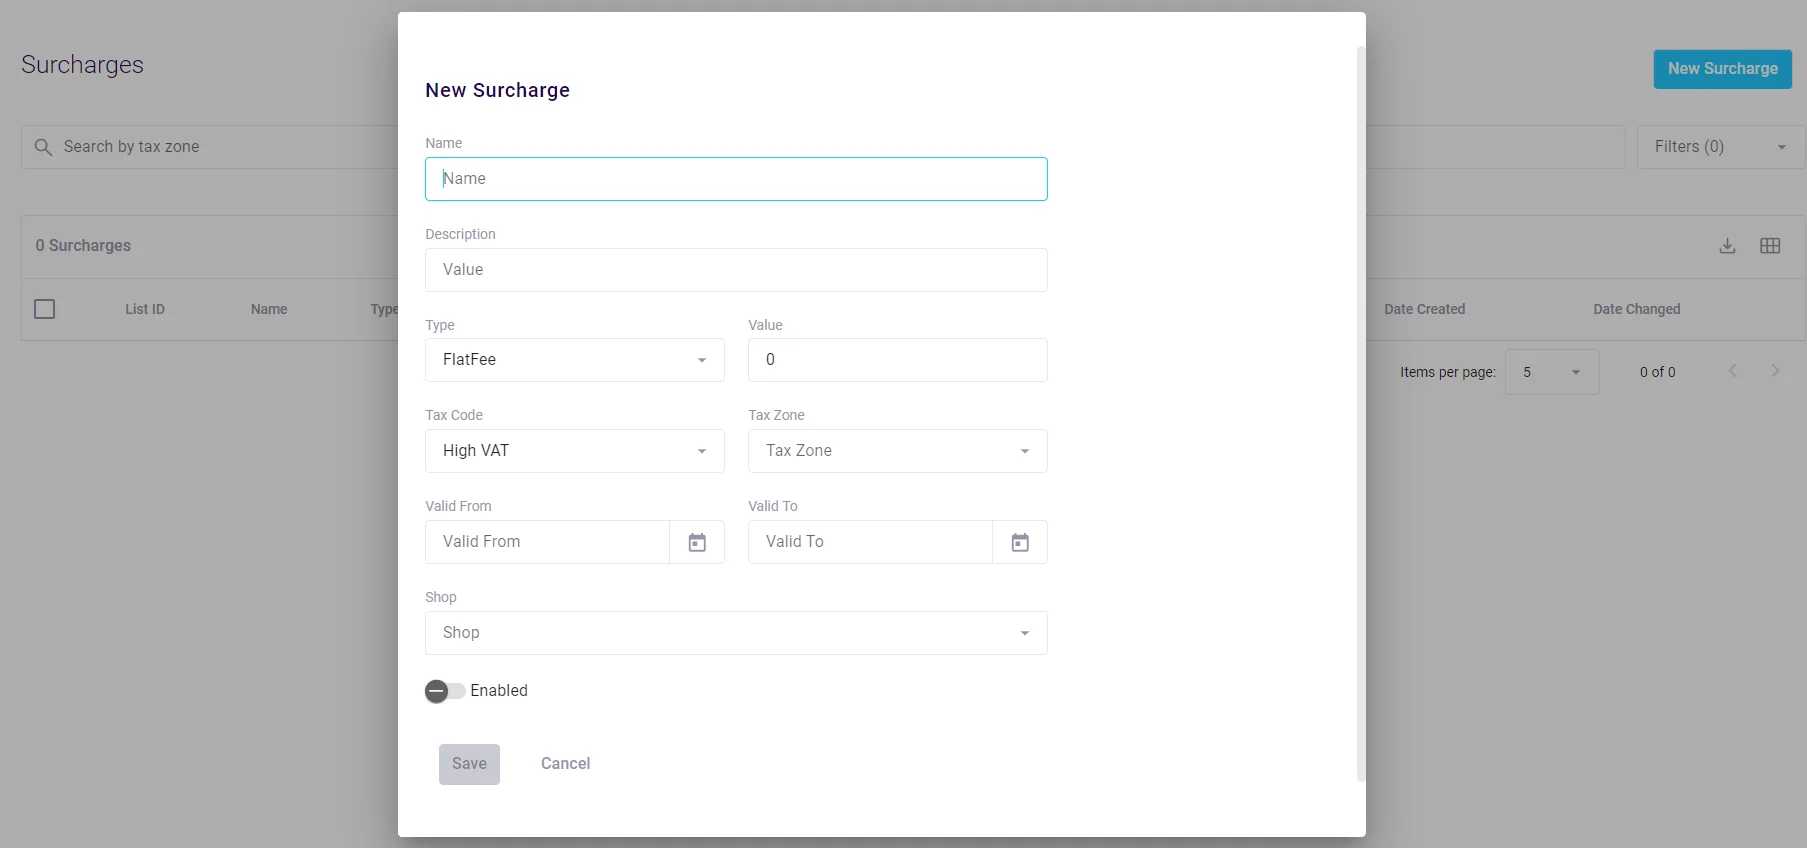
- A popup window titled New Surcharge will appear.

Step 3: Configure Surcharge Details
Complete the following fields in the popup:
Required Information
-
Name (NL): Enter a descriptive name for the surcharge
- Use the language dropdown to add names in multiple languages
- Examples: "Deposit", "Environmental Fee", "Handling Charge"
-
Type: Select the surcharge calculation method
- FlatFee: Fixed amount added to the product price
- Percentage: Percentage of the product price
-
Value: Enter the surcharge amount
- For FlatFee: Enter the fixed amount (e.g., 0.15 for €0.15)
- For Percentage: Enter the percentage (e.g., 5 for 5%)
-
Tax Code: Select the applicable tax code
- H: High tax rate
- L: Low tax rate
- N: No tax (Zero VAT)
-
Tax Zone: Enter the tax zone where this surcharge applies
- Default: "NL"
- Must match configured tax zones in your system
-
Enabled: Toggle to activate or deactivate the surcharge
- Enable immediately or keep disabled until ready
-
Shop: Select specific shop
Optional Information
-
Description: Provide additional details about the surcharge
- Helps other users understand the purpose and application
- Available in multiple languages
-
Valid From: Set a start date for the surcharge
- Leave empty to apply immediately
- Format: YYYY-MM-DD
-
Valid To: Set an end date for the surcharge
- Leave empty for no expiration
- Useful for temporary fees or promotional periods
Step 4: Save the Surcharge
- Click Save to create the surcharge.
- The popup will close and the new surcharge will appear in the list.
- Click Cancel to discard changes.
Adding Surcharges to Products
After creating a surcharge, you need to assign it to products:
- Navigate to the product you want to add the surcharge to
- Look for the surcharges section in the product details
- Select the applicable surcharges from the available list
- Save the product to apply the surcharges
For detailed instructions, see the Product Surcharges Guide.
Editing Existing Surcharges
- Click on any surcharge in the list to edit it.
- The Edit Surcharge popup will open with current values.
- Make necessary changes to:
- Name and description translations
- Type and value (affects all products using this surcharge)
- Tax settings
- Validity dates
- Enabled status
- Click Save to apply changes.
Best Practices
- Consistent Types: Use FlatFee for fixed costs, Percentage for variable fees
- Tax Compliance: Ensure correct tax codes match your regional requirements
- Validity Periods: Use date ranges for seasonal or temporary surcharges
- Documentation: Always add descriptions to explain when/why surcharges apply
Common Use Cases
Environmental Fees
- Deposit on bottles: FlatFee of €0.15 per item
- Recycling fee: Percentage based on product category
- Waste disposal charge: Fixed fee per electronic item
Handling Charges
- Oversized items: Percentage of product value
- Fragile goods: Fixed handling fee
- Special packaging: Additional flat fee
Regulatory Fees
- Import duties: Percentage based on product origin
- Safety compliance: Fixed fee per regulated item
- Environmental tax: Variable percentage by category
Important Notes
- Surcharges are calculated on top of the product price
- Multiple surcharges can apply to a single product
- Tax is calculated on the surcharge amount based on the configured tax code
- Changes to surcharge values affect all products using that surcharge
- Disabled surcharges remain assigned to products but don't apply to calculations
- Date-based validity allows scheduling surcharge changes in advance